Categories
Uncategorized

Best Packing Cubes for Travel

Traveling can be an enriching experience, but anyone who’s ever packed a suitcase knows the challenges of keeping everything organized, especially for those longer trips. Enter the game-changer: packing cubes. These nifty organizers not only help you maintain order in your suitcase but also maximize space, making them a must-have for any traveler.

What Are Packing Cubes?

At their core, packing cubes are small, usually rectangular bags made of fabric, designed to compartmentalize your luggage. Their primary purpose is to keep your belongings neatly folded or rolled, preventing them from getting tangled or wrinkled during transit. They come in various sizes and materials, catering to different packing needs and preferences.

Benefits of Using Packing Cubes

The advantages of using packing cubes are manifold. They promote better organization by allowing you to categorize your items, making it easier to find what you need without rummaging through your entire suitcase. They can also compress your clothes, freeing up valuable space. Furthermore, they streamline the unpacking process, as you can simply transfer the cubes directly into drawers.

Types of Packing Cubes

  • Compression cubes are ideal for minimizing the volume of your clothes.
  • Waterproof cubes protect your belongings from moisture and spills.
  • Eco-friendly cubes offer a sustainable option, often made from recycled materials.

How to Choose the Right Packing Cubes

Selecting the perfect packing cube depends on your travel needs. Consider the size and capacity to ensure they fit your luggage and can accommodate your items. The material should be durable, capable of withstanding the rigors of travel. Additionally, look for features like compression ability or waterproofing, depending on your requirements.

Top 5 Packing Cubes for Travel

Let’s dive into some of the best packing cubes on the market, highlighting their features, pros, and cons.

BAGAIL 8 Set Packing Cubes

Features

These bags stand out for their practical benefits, design appeal, and the convenience they offer to users seeking organized and efficient packing solutions. However, attention to concerns about zipper quality and product consistency could further enhance their value and user satisfaction.

Pros

  • Size: Customers appreciate the ample space these storage bags offer, making it easier to pack a variety of items.
  • Value: The cost-effectiveness of these bags is highlighted, providing good quality and functionality for the price.
  • Appearance: The aesthetic appeal, particularly the adorable flamingo print, is frequently mentioned and appreciated.

Cons

  • Zippers: A common issue among some users is the durability and functionality of the zippers, with reports of them breaking or getting stuck.
  • Mixed Opinions on Quality: While many are satisfied, there are varying opinions regarding the overall quality of the bags, suggesting inconsistency in production.

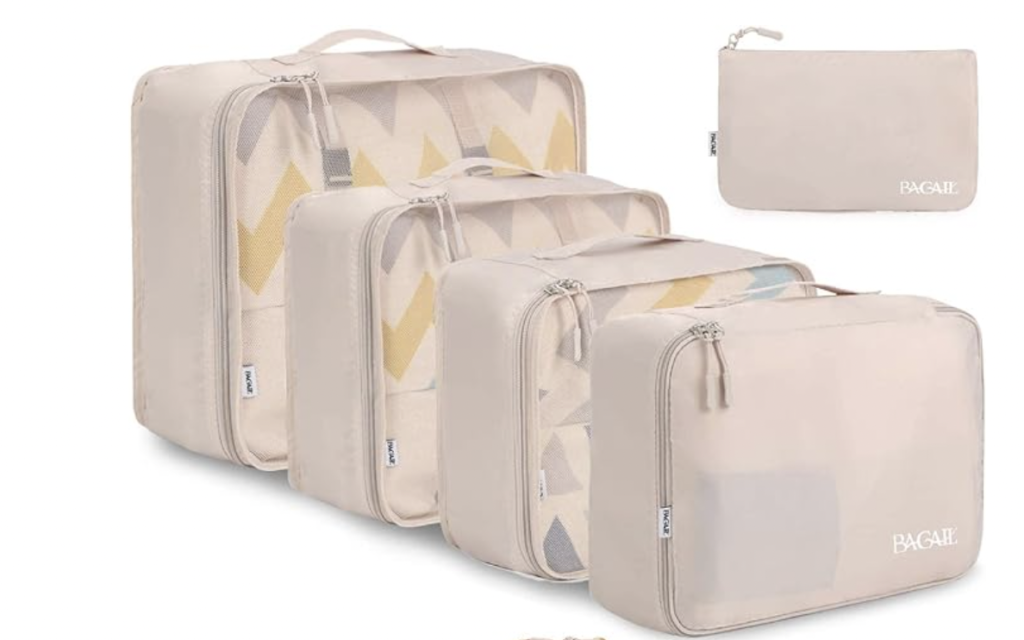
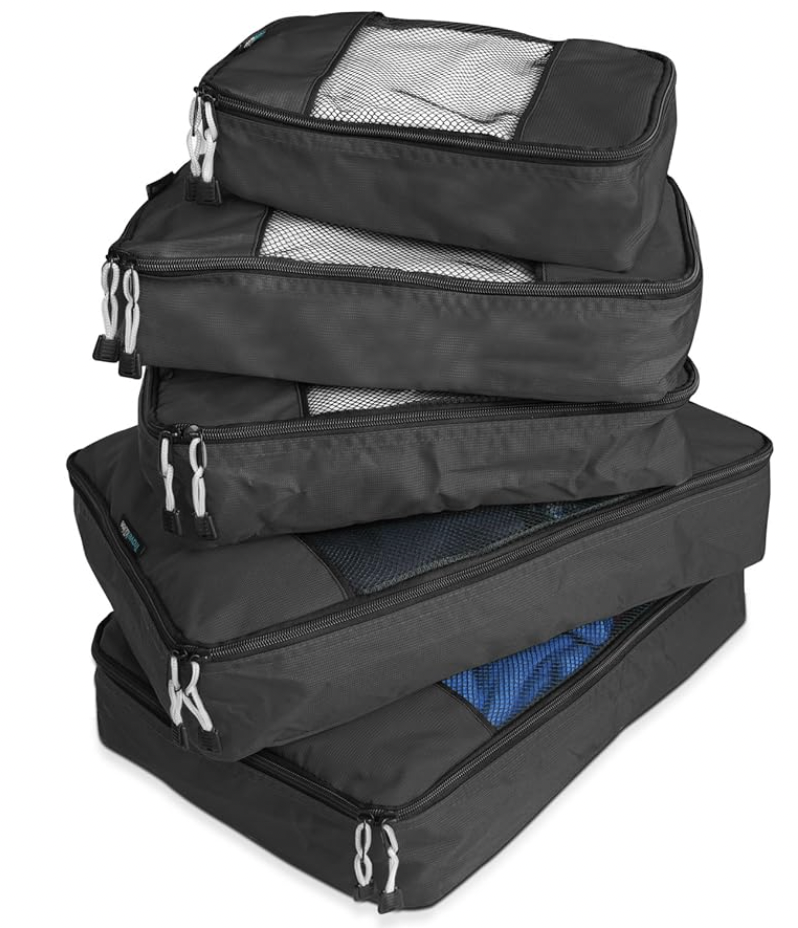
BAGSMART 6 Set/4 Set/2 Set Compression Packing Cubes
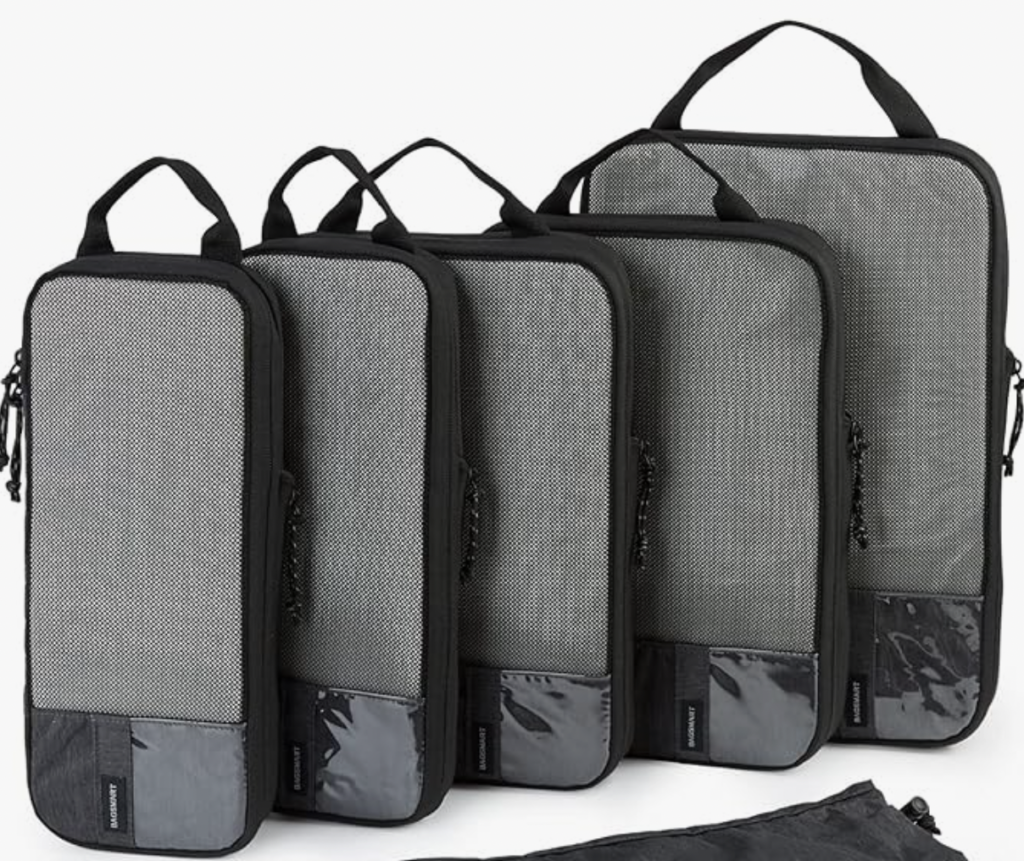
Features

This storage bag has garnered positive feedback for its contribution to a more organized and efficient packing experience. Customers value the ease of organizing outfits, the convenience of the delivery process, and the bag’s performance in securing items for travel. The option to choose from different sizes further enhances the product’s appeal, allowing for tailored packing solutions that cater to diverse needs and preferences.

Pros

  • Organization: The storage bag is highly praised for its ability to neatly organize outfits, making it simpler to pack and locate items.
  • Ease of Delivery: Customers appreciate the prompt and hassle-free delivery service, adding convenience to the purchasing experience.
  • Performance: The functionality and reliability of the storage bag in keeping items secure and organized during travel are well-regarded.
  • Size Variability: The availability of different sizes is a significant plus, enabling more efficient packing strategies and accommodating various packing needs.

Cons

  • Space and Quality Satisfaction: While many customers are satisfied, there is an implication that not all expectations regarding space and quality are fully met for some users.
  • Zipper and Compression: Feedback on the zipper functionality and the effectiveness of the compression feature is mixed, with some users experiencing issues or finding them less useful than anticipated.

TravelWise Luggage Packing Organization Cubes

Features

This storage bag has garnered positive feedback for its contribution to a more organized and efficient packing experience. Customers value the ease of organizing outfits, the convenience of the delivery process, and the bag’s performance in securing items for travel. The option to choose from different sizes further enhances the product’s appeal, allowing for tailored packing solutions that cater to diverse needs and preferences.

Pros

  • Quality: The high-quality construction of the storage bags is frequently commended, suggesting they are built to last and withstand the rigors of travel.
  • Performance: Users are satisfied with how well the bags serve their intended purpose, effectively organizing and protecting their belongings.
  • Size: Many customers are pleasantly surprised by the larger-than-expected size of the bags, providing ample space for packing needs.
  • Travel Efficiency: The ease and convenience these bags add to the travel experience are highlighted, making them ideal for both short and long journeys.
  • Organizational Benefits: The bags are praised for their excellent organizational capabilities, allowing travelers to keep their items neatly sorted and accessible.

Cons

  • Given the positive feedback, specific drawbacks were not mentioned, indicating a high level of customer satisfaction with these storage bags.

Shacke Pak – 5 Set Packing Cubes
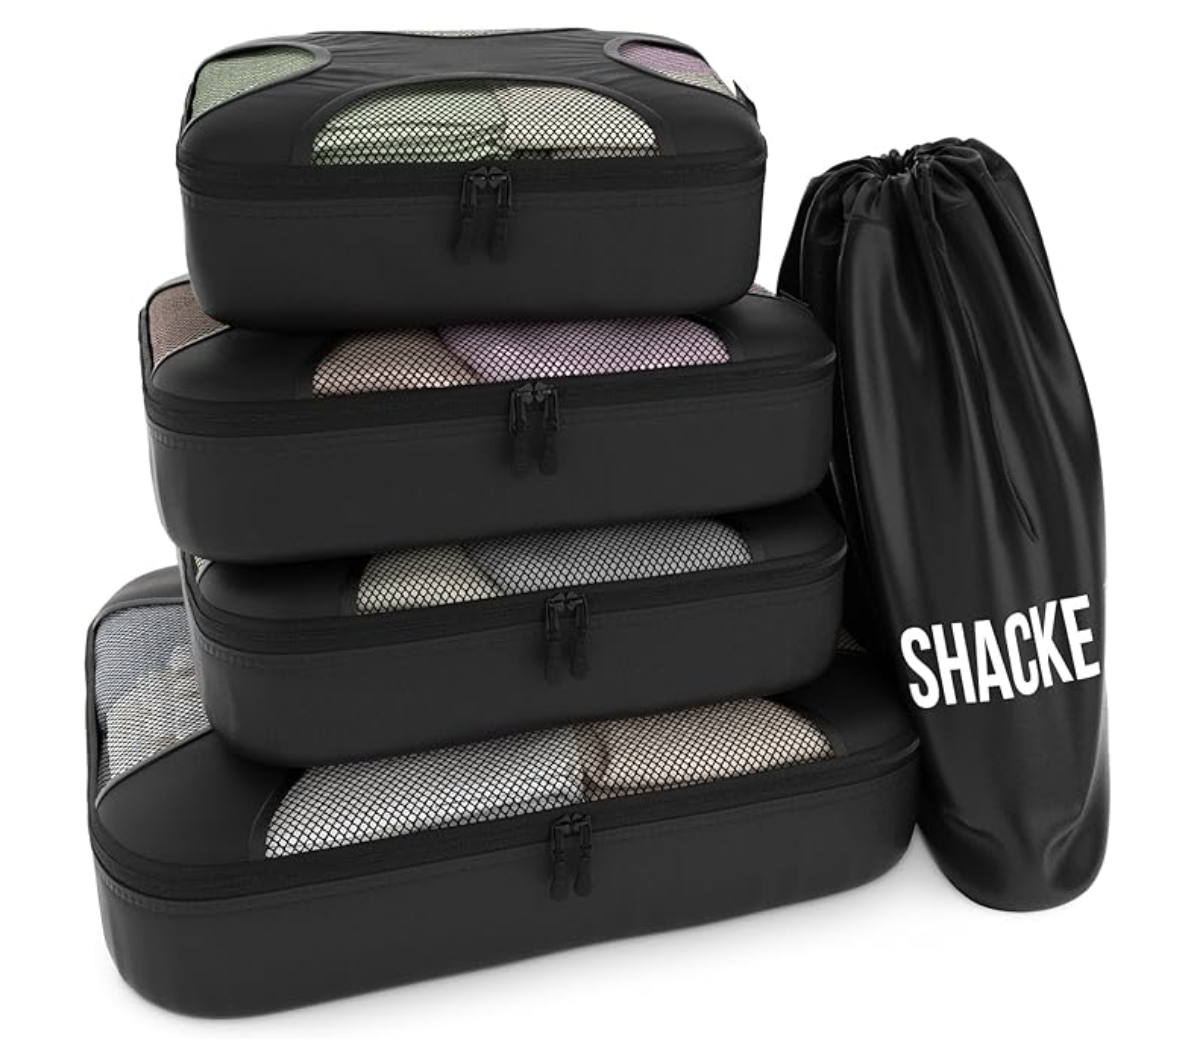
Features

These storage bags have received positive feedback for their quality, effectiveness in travel, and spaciousness. They are described as sturdy, capable of fitting a substantial amount of clothing, and excellent for maximizing suitcase space—attributes that contribute significantly to their appeal. Moreover, their organizational capabilities and ease of use are greatly appreciated by users, making packing less of a chore and more of a strategic, efficient process.

Pros

  • Quality: The robustness and durability of the storage bags are frequently praised, indicating they are made to endure the demands of travel.
  • Travel Efficiency: Customers appreciate how these bags facilitate travel by organizing and protecting their belongings effectively.
  • Size: The capacity of the bags to accommodate a week’s worth of clothing demonstrates their generous size and space efficiency, allowing for maximum utilization of suitcase space.
  • Organization: The ability to organize items neatly and accessibly is highlighted as a significant benefit, contributing to a smoother travel experience.
  • Ease of Use: Users find these storage bags straightforward and hassle-free to use, further enhancing the overall packing and travel process.

Cons

  • Specific negatives were not highlighted, suggesting customers are overall very satisfied with the product’s features and functionality.

ECOHUB 7 Set Packing Cubes Tear-Resistant Luggage Packing Organizers
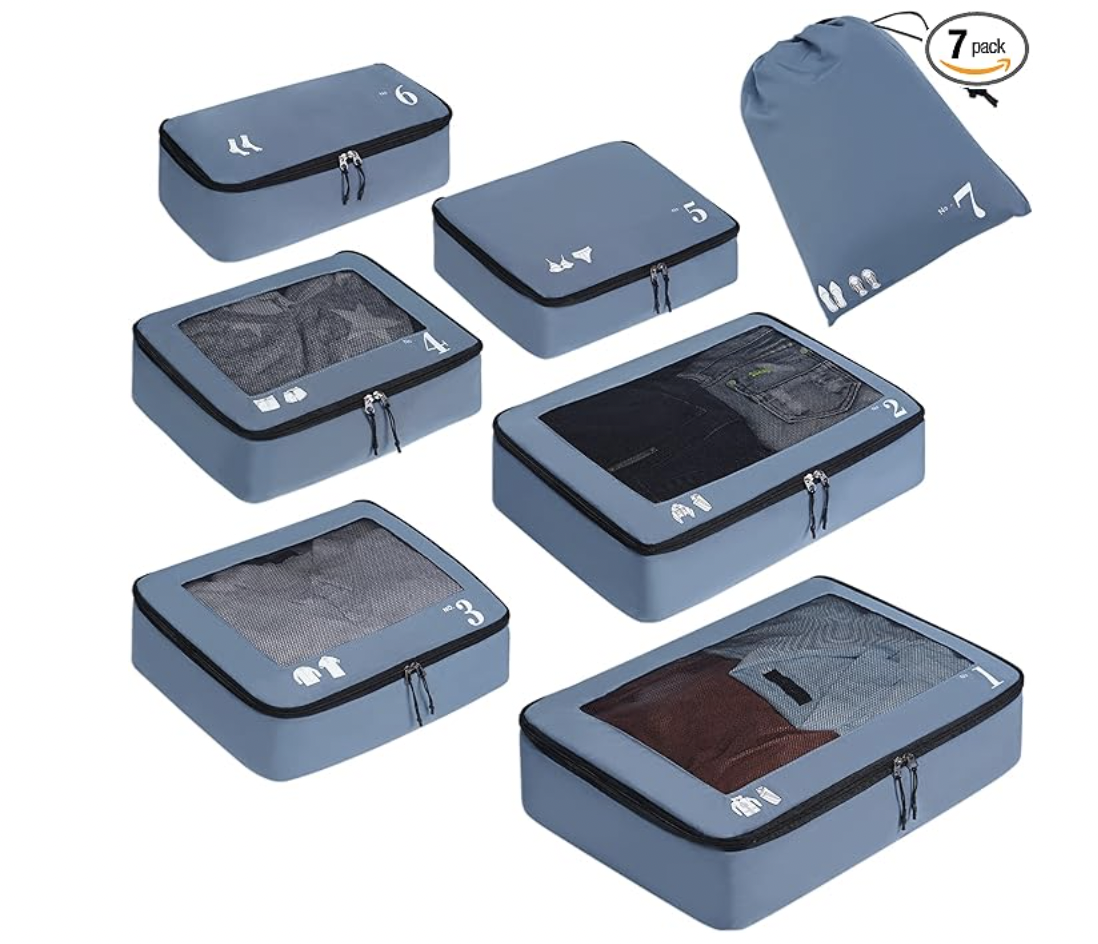
Features

These bags garner approval for its exceptional sturdiness, effective organization, versatile use, appealing color options, strong zippers, and the practicality of mesh for airflow. Its construction is noted for both durability and aesthetic appeal, making it a favored choice among consumers for a variety of travel scenarios. The bag’s ability to cater to different trip lengths, coupled with its visual appeal, positions it as a versatile and attractive travel accessory. Additionally, functional elements like robust zippers and breathable mesh sections further enhance the user experience by offering security for belongings and maintaining their freshness over time.

Pros

  • Sturdiness: The robust construction of the storage bag is a key highlight, with customers noting its durability and well-made quality.
  • Organization: Users value the bag’s ability to keep their items neatly organized, enhancing the packing and travel experience.
  • Versatility: The flexibility to use the bag for both short and long journeys is particularly appreciated, indicating its suitability for various travel needs.
  • Color: The aesthetic appeal of the bag, specifically its beautiful colors, is mentioned as a standout feature, making it visually pleasing as well as functional.
  • Strong Zippers: The durability and reliability of the zippers are emphasized, suggesting they play a significant role in the bag’s overall functionality and security.
  • Mesh for Airflow: The inclusion of mesh sections to allow for air circulation is praised, helping to keep contents fresh and reducing the risk of musty odors.

Cons

  • The feedback does not explicitly mention any cons, indicating a high level of satisfaction with the storage bag’s features and performance.

How to Pack Efficiently with Packing Cubes

Mastering the art of packing efficiently transcends merely filling up your packing cubes; it’s about strategic organization and space optimization. The initial step in this process is the thoughtful categorization of your belongings. Designate separate cubes for different types of items – clothes in one, electronics in another, toiletries in a third, and so forth. This not only makes packing simpler but also ensures you can easily locate what you need upon reaching your destination without having to dig through a disorganized suitcase.

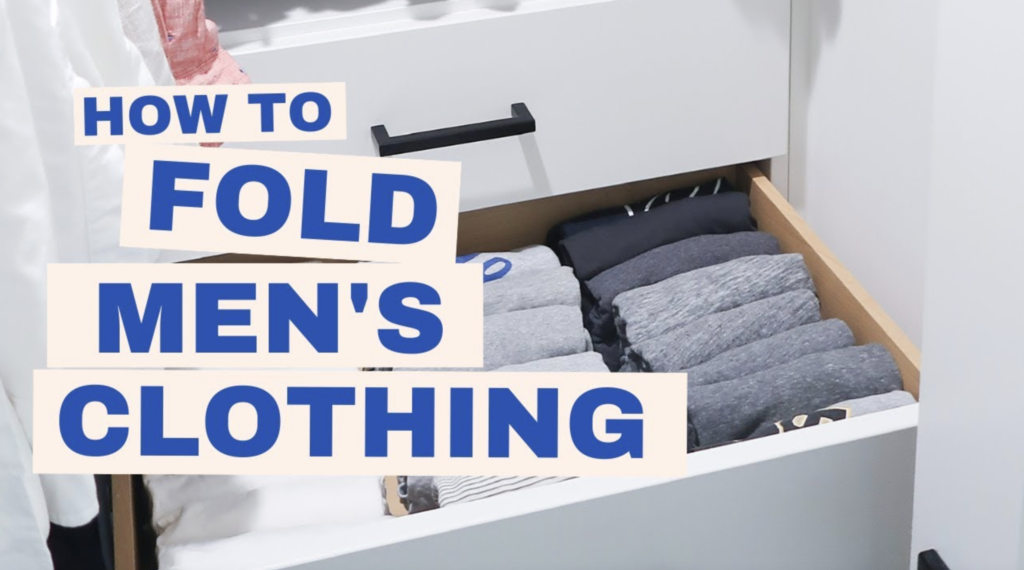
When it comes to clothes, the method you choose to place them in the cube can significantly impact the amount of space you save. Rolling your clothes is a highly effective technique for both maximizing space and minimizing wrinkles. It allows you to fit more items into each cube while keeping them relatively wrinkle-free, compared to folding. For those items that do require folding, aim to do so in a way that complements the shape of the cube, ensuring a snug and efficient fit.

Another crucial aspect to consider is the weight distribution within your suitcase. Placing heavier cubes at the bottom of your suitcase is a wise move. This strategy is not just about organization – it’s about ensuring the stability and balance of your luggage. A suitcase that is evenly balanced is easier to maneuver and less likely to tip over, making your travel experience smoother and more enjoyable.

Caring for Your Packing Cubes

Caring for your packing cubes is a simple and hassle-free process, ensuring they remain in top condition for years to come. The majority of packing cubes are designed with durability and easy maintenance in mind, allowing for machine washing which is both efficient and effective. To clean them, simply place the cubes in your washing machine, selecting the gentle cycle with cold water to prevent any potential damage to the fabric. This method is gentle yet sufficient to remove the dirt and grime accumulated during your travels or home use.

Once the wash cycle is complete, it’s advisable to air-dry the cubes rather than using a tumble dryer. The heat from a dryer can potentially warp or shrink the material, compromising the cube’s shape and integrity. Instead, lay them flat or hang them up to dry naturally, ensuring they are fully dry before storing them away to prevent mold or mildew growth.

It’s important to note that certain cleaning agents like bleach and fabric softeners should be avoided when washing your packing cubes. Bleach can weaken the fabric’s fibers over time, while fabric softeners can leave a residue that affects the material’s breathability and moisture-wicking properties. Sticking to mild detergents will clean effectively without causing harm to the cubes.

Alternative Uses for Packing Cubes

Packing cubes, while initially designed for travel, offer versatile organizational benefits that extend far into the realms of home use. Their structured design and varying sizes make them perfect for tackling clutter in numerous home environments, turning chaos into order with minimal effort.

For seasonal clothing, packing cubes can be a game-changer. Instead of letting off-season apparel take up valuable closet space or get lost in the depths of under-bed storage, packing cubes allow for neat compartmentalization. You can easily store summer clothes in larger cubes during the winter months and vice versa, stacking them neatly on a closet shelf or sliding them under the bed. This not only keeps your clothes dust-free and organized but also makes the seasonal wardrobe swap a breeze.

In the realm of crafts, where small items like beads, threads, and scraps of fabric can quickly become a tangled mess, packing cubes come to the rescue. By dedicating specific cubes to different materials or project types, craft enthusiasts can maintain a clean and orderly workspace. The transparent mesh on many cubes means that contents can be identified at a glance, eliminating the need to rummage through multiple containers to find what you’re looking for.

Conclusion

Packing cubes transform the way we pack, making them an indispensable tool for travelers. By choosing the right cubes and using them effectively, you can enjoy a more organized and stress-free travel experience. Remember, the best packing cube is one that suits your specific travel style and needs.

Categories
Uncategorized

Here’s How to Organize Diaper Bag

Are you a new parent struggling to keep your diaper bag organized?

From selecting the right bag to creating a running checklist, packing essentials, and utilizing separate accessories, we’ve got you covered.

So, grab your diaper bag and let’s get organized!

Key Takeaways:

  • Choose a diaper bag with enough space and compartments for easy organization.
  • Create a checklist of essential items and regularly review and update it.
  • Maximize space by using compact and multi-functional items, and have quick access to wipes and hand sanitizer.

Selecting the Right Diaper Bag

Regarding selecting the right diaper bag, parents have a myriad of options available, ranging from stylish and neat designs offered by Itzy Ritzy to the functional and versatile offerings from Perry Mackin.

One of the most important factors to consider when choosing a diaper bag is the size and storage options. Parents need to ensure that the bag has enough space to accommodate all the essentials without being too bulky or heavy to carry around.

The durability and material of the bag should be taken into account, as it needs to withstand the wear and tear of daily use. The bag’s organizational features such as pockets, compartments, and insulated bottle holders are also crucial for keeping everything organized and easily accessible.

The comfort and convenience of carrying the bag should not be overlooked. Adjustable padded straps and lightweight construction can make a significant difference, especially for parents who are constantly on the go.

Style and design preferences also play a key role. Some may prioritize a sleek, minimalist look while others may opt for vibrant colors and patterns to express their personality.

Creating a Running Diaper Bag Checklist

Creating a running diaper bag checklist is essential for ensuring that parents have all the necessary items for their baby’s care and comfort, including seasonal cleaning and diaper bag-specific supplies offered by brands like Perry Mackin.

When compiling a comprehensive diaper bag checklist, it’s important to consider the specific needs of the baby. This includes items such as diapers, wipes, changing pad, baby lotion, and extra clothing. These essentials ensure that parents are well-prepared for any situation.

It’s also helpful to include diaper bag-specific supplies, such as insulated bottle holders and convenient stroller attachments. These additions optimize convenience and organization for parents on-the-go.

Regularly updating and maintaining the diaper bag checklist is crucial. This allows for accommodation of the changing needs of the baby and helps keep the bag organized. It’s recommended to periodically perform seasonal cleaning, including checking for expired items, refreshing supplies, and ensuring cleanliness. This ensures a well-kept and functional diaper bag at all times.

Starting with the Essentials

When starting with the essentials for a diaper bag, it’s crucial to include items such as baby wipes, diaper cream, and spare clothes, as these play a fundamental role in addressing common baby surprises and ensuring comfort on-the-go.

It’s inevitable that babies will have unexpected diaper blowouts or messy feeding times while out and about, hence having a compact supply of baby wipes ensures you can swiftly clean and freshen up your little one.

Additionally, diaper cream is an essential to prevent and soothe any discomfort caused by diaper rash, keeping your baby’s delicate skin healthy.

Packing spare clothes comes in handy for those unforeseen accidents, making sure you’re prepared for any unexpected turns during your day out.

Utilizing Separate Diaper Bag Accessories and Supplies

Utilizing separate diaper bag accessories and supplies, such as teethers, pacifiers, and sunscreen, allows parents to cater to additional needs and specific situations while adhering to a well-structured diaper bag checklist.

Teethers provide comfort for teething babies, reducing fussiness and sore gums during outings. Including pacifiers in the diaper bag can offer quick soothing for a fussy baby, especially during travel or while waiting in queues.

Sunscreen is an essential addition for outdoor activities, ensuring that the baby’s delicate skin remains protected from harmful sun rays. By integrating these specific items into the diaper bag, parents can confidently tackle various scenarios, whether it’s a teething episode, comforting a restless baby, or enjoying outdoor adventures.

Optimizing Pocket Placement

Optimizing pocket placement within a diaper bag, especially in designs like quilted backpacks, is crucial for efficient organization and easy access to essential items, contributing to seamless diaper bag organization.

Pockets strategically placed in the front compartments allow for quick retrieval of frequently used items, such as wipes, pacifiers, and bottles. The interior pockets can be designed with dedicated sections for diapers, changing mats, and baby clothes to ensure a systematic arrangement.

Specialized pockets for personal items like keys, phones, and wallets can be incorporated into the design to keep them separate from baby essentials. By utilizing these design features, parents can not only optimize the functionality of the diaper bag but also enhance their overall convenience when on-the-go.

Preparing for Messy Situations

Preparing for messy situations is a crucial aspect of diaper bag preparation, involving the inclusion of wet bags, plastic bags, and other essentials to handle diaper disasters and unexpected baby surprises effectively.

It’s essential to have wet bags to store soiled diapers and soiled clothing, preventing any mess from spreading to other items in the diaper bag.

Additionally, plastic bags are handy for containing odors and providing a temporary solution when a trash bin is not immediately available.

Having a few extra sets of baby clothes and disposable changing pads can be a game-changer when unexpected diaper disasters occur while out and about with your little one.

Ensuring an Ample Supply of Diapers

Ensuring an ample supply of diapers in the diaper bag is essential for parents to handle any diaper-related needs while on-the-go, emphasizing the importance of thorough packing and an effective diaper checklist.

When packing for an outing, it’s important to consider how long it will last in order to determine the necessary quantity of diapers. For a short trip to the store, a few diapers may be enough. However, for longer outings, it’s best to pack a more substantial supply. It’s also wise to pack extra diapers beyond the estimated need, as unexpected situations can arise.

A comprehensive diaper checklist should take into account the varying needs of the baby, including enough diapers for changes, potential accidents, and unexpected delays. It’s always better to be over-prepared than to be caught without enough diapers.

Regularly Reviewing and Updating Supplies

Regularly reviewing and updating supplies within the diaper bag, including seasonal cleaning and restocking items like baby wipes from trusted brands like Perry Mackin, ensures that parents are well-prepared for their baby’s needs at all times.

As a parent, staying organized and prepared is key to managing the daily chaos that comes with taking care of a baby.

Regarding diaper bag essentials, periodically reviewing and refreshing the supplies is crucial. For instance, as the seasons change, so do the needs of your baby. Baby wipes, in particular, play a vital role in keeping your little one clean and comfortable.

This is where reliable brands like Perry Mackin step in, ensuring that you always have access to high-quality and reliable supplies.

Efficiently Packing and Organizing the Diaper Bag

Efficiently packing and organizing the diaper bag is fundamental for ensuring a well-structured and readily accessible arrangement of essential items and diaper bag accessories, promoting convenience and preparedness for parents on-the-go.

Proper organization can streamline the process of finding diapers, wipes, and changing pads swiftly when needed, minimizing stress during outings.

Including clear zipper pouches or labeled compartments within the bag can help separate soiled items and keep clean ones easily accessible, maintaining a hygienic environment.

Having a designated spot for necessities such as bottles, pacifiers, and a changing pad can ensure that these items are always handy, cutting down on time spent rummaging through the bag.

Incorporating these strategies can significantly elevate the functionality and accessibility of a diaper bag, making day-to-day activities with the child more manageable and enjoyable.

Utilizing Compartments and Dividers

Utilizing compartments and dividers in a diaper bag, especially for items like wet bags and changing pads, facilitates efficient organization and separation of essential baby supplies, enhancing the overall functionality of the bag.

A diaper bag with specialized compartments for wet bags and changing pads offers convenience and organization. The wet bag compartment keeps damp or soiled items separate from clean supplies, while a dedicated space for changing pads allows for quick access during diaper changes. This streamlined approach can reduce stress and frustration while caring for a baby on-the-go.

Maximizing Space with Compact and Foldable Items

Maximizing space within a diaper bag can be achieved by including compact and foldable items such as the Travel Happens™ Wet Bag, allowing parents to optimize storage and efficiently accommodate essential supplies for their baby.

These items not only fit snugly into the bag, but they also serve multiple purposes, further minimizing the need for additional space-consuming products.

For instance, a compact changing pad that doubles as a storage space for wipes or diapers can save significant space. Foldable silicone bibs that can be easily cleaned and kept in a small case are a practical and space-saving solution for feeding times on the go.

Utilizing Insulated Pockets for Bottles and Food

Utilizing insulated pockets within a diaper bag, especially for storing bottles and food, is a practical feature offered by designs like the Triple Threat™ Convertible Diaper Bag, ensuring the proper storage and temperature control of essential baby provisions.

These insulated pockets are specifically designed to keep the temperature of stored liquids and food consistent, protecting them from external elements and maintaining their freshness.

The insulated feature helps to prevent the contents from spoiling or becoming too warm or cold, which is vital for ensuring that your baby’s meals and drinks remain fresh and safe throughout the day.

The temperature-controlled storage provided by insulated pockets is particularly beneficial for storing breast milk or formula, as it helps to preserve the nutrients and quality of these vital nourishments for your baby.

Whether you are on a short outing or a longer trip, having this feature in your diaper bag can make it easier to feed your little one while on the go without worrying about the quality of their meals.

Including a Changing Pad for On-the-Go Diaper Changes

Including a changing pad in the diaper bag is essential for facilitating on-the-go diaper changes and addressing potential diaper disasters, complementing the functionality of the bag with a crucial accessory for baby care.

A changing pad provides a clean and soft surface for quick diaper changes when you’re out and about. With its waterproof and easy-to-clean features, it shields your baby from unhygienic surfaces, preventing rashes and infections.

It offers peace of mind, knowing that you can handle unexpected messes efficiently. This small yet significant addition to your diaper bag ensures that you are always prepared for any diaper-related emergencies, making outings with your little one stress-free and enjoyable.

Organizing Baby and Parent Essentials Separately

Organizing baby and parent essentials separately within the diaper bag contributes to efficient and accessible storage, ensuring that essential supplies and personal items are well-structured and readily available, supported by the use of designated compartments like wet bags.

By segregating baby essentials such as diapers, wipes, and bottles from parent items like keys, wallet, and phone, it becomes easier to find what you need quickly, especially during time-sensitive situations.

This organization prevents items from getting mixed up or lost in the bottomless pit of the diaper bag, saving parents from unnecessary stress and frustration. Utilizing wet bags for soiled garments or pacifiers keeps them separate, reducing the risk of contamination and contributing to a more hygienic and organized diaper bag.

Ensuring Quick and Easy Access to Wipes and Hand Sanitizer

Ensuring quick and easy access to wipes and hand sanitizer within the diaper bag is a vital element of packing and organization, addressing the need for convenient and readily available hygiene essentials while adhering to a comprehensive diaper bag checklist.

Strategic placement of these items can make all the difference when dealing with unexpected messes or the need for a quick clean-up on the go. Placing them in easily accessible compartments or pockets can save valuable time and effort.

Keeping an extra set of wipes and sanitizer can provide a safety net, ensuring that you’re always prepared. Proactively restocking these essentials helps to maintain their availability, making them reliable allies when it comes to maintaining hygiene while out and about.

Staying Organized with Portable Waste Disposal Bags

Staying organized with portable waste disposal bags in the diaper bag is essential for addressing diaper disasters and managing waste in a hygienic and efficient manner, emphasizing the role of practical solutions like plastic disposal bags for seamless organization.

Even a quick trip with a baby can bring unexpected surprises, and being prepared for every eventuality can make the journey more manageable.

Having a supply of portable waste disposal bags not only helps in containing and discretely disposing of used diapers when there are no proper disposal facilities available but also ensures a cleaner and more organized diaper changing routine.

Incorporating these plastic disposal bags into the diaper bag promotes an eco-friendly approach to waste management, making it a practical solution for on-the-go parents.

Keeping Important Documents and Emergency Information Handy

Keeping important documents and emergency information handy within the diaper bag is essential for ensuring preparedness and organization, highlighting the need for readily accessible and well-maintained documents to address potential emergencies and requirements.

Having essential documents neatly stored in the diaper bag can be a lifesaver in unexpected situations. Whether it’s a copy of the baby’s health insurance card, a list of emergency contacts, or important medical records, having them at your fingertips can make all the difference.

With easy access to these documents, you can swiftly handle any unforeseen needs that may arise while you’re out and about with your little one. Organized storage of information such as allergy lists, pediatrician contact details, and any necessary parental consent forms can give parents peace of mind, knowing that they are well-prepared for any urgent medical care or unexpected events.

Utilizing Multi-functional Items for Space Efficiency

Utilizing multi-functional items within the diaper bag contributes to space efficiency and streamlined organization, making it essential to include versatile accessories like wet bags that serve multiple purposes while optimizing storage space.

Having versatile and multi-functional items in your diaper bag not only saves space but also ensures that you have everything you need at your fingertips.

For example, a wet bag not only keeps wet clothes separate but can also be used for storing diapers, wipes, or even as a makeshift changing mat in a pinch. With such accessories, you can easily organize your bag and be prepared for any situation that may arise while on the go.

Maintaining a Clean and Tidy Diaper Bag

Maintaining a clean and tidy diaper bag, including regular seasonal cleaning and the use of reliable cleaning supplies from brands like Perry Mackin, is essential for upholding hygiene and organization, ensuring that the diaper bag is always ready for use.

Regular maintenance not only helps in preventing odors and stains but also ensures that the diaper bag’s contents remain in good condition. During spring cleaning, empty the bag completely and wipe down all surfaces with a mild detergent.

Remember to check for any forgotten items that may have been lost at the bottom of the bag. Utilizing trusted cleaning supplies from Perry Mackin can make this process even easier, as their products are specifically designed for the care of diaper bags, ensuring that both the interior and exterior fabrics are well-maintained and clean.

Conclusion

Organizing a diaper bag effectively is vital for ensuring that parents are well-prepared to cater to their baby’s needs while on-the-go, and the inclusion of appropriate accessories and essentials is essential for creating a well-rounded and functional diaper bag.

Effective organization ensures that essential items are easily accessible, reducing stress and enabling quick responses to the baby’s requirements.

Various accessories and supplies, such as changing pads, bottle holders, and insulated pockets, play a pivotal role in enhancing the bag’s functionality and versatility.

Compartments and pockets help categorize and group items, making it effortless to locate specific necessities, fostering convenience, and efficiency.

Frequently Asked Questions

1. How can I effectively organize my diaper bag to avoid clutter and find everything I need quickly?

The key to organizing your diaper bag is to have a designated spot for each item. Use storage compartments or pouches to keep items separated and easily accessible.

2. What are some essential items to have in a diaper bag and how should I arrange them?

Some essential items for a diaper bag include diapers, wipes, changing pad, extra clothes, bottles, and snacks. Arrange them in order of importance and frequency of use, with the frequently used items at the top.

3. How can I save space in my diaper bag without sacrificing necessary items?

Consider using travel-sized or sample-sized items to save space. Also, try folding clothes and blankets instead of rolling them to maximize space.

4. What should I do with dirty or wet items in my diaper bag?

It’s a good idea to have a wet bag or separate compartment for dirty items to avoid contaminating the rest of the bag. You can also use disposable bags or ziplock bags to contain any mess.

5. How often should I declutter and organize my diaper bag?

It’s recommended to declutter and reorganize your diaper bag at least once a week to ensure you have all necessary items and to remove any items that are no longer needed.

6. What are some tips for maintaining an organized diaper bag while on-the-go?

Keep a small bag or pouch within your diaper bag for quick and easy access to items like diapers and wipes. Also, make it a habit to restock and organize your diaper bag after each use to avoid a messy bag.

Categories
Uncategorized

Here’s How to Organize Baby Dresser

Are you a new parent looking to optimize the organization of your baby’s dresser?

Look no further! In this article, we’ll provide you with practical tips from experts on how to effectively organize your baby’s dresser.

Keep reading for more tips and inspiration on optimizing baby dresser organization.

Key Takeaways:

  • Sort baby clothes by size and type in separate drawers to easily find and access what you need.
  • Create a diaper changing station in one of the drawers for quick and convenient diaper changes.
  • Maximize space by using overflow drawers, drawer dividers, and organizers to keep items organized and easily accessible.

How to Organize Your Baby’s Dresser: Practical Tips from Experts

Organizing your baby’s dresser is crucial for maintaining a tidy and efficient nursery space. Expert advice and practical tips can help streamline the process, ensuring that essential items are accessible and well-organized.

Nursery Dresser Organization Essentials

In terms of nursery dresser organization, certain essentials play a pivotal role in maintaining order and accessibility. These essentials encompass various aspects such as organizing baby clothes, utilizing drawer dividers, and creating a functional changing station.

Drawer 1: Sorting Baby Clothes by Size and Type

The first drawer of the nursery dresser is dedicated to sorting and organizing folded baby clothes based on size and type, ensuring that the clothing items are easily accessible and well-organized for everyday use.

It’s crucial to have the baby’s clothes sorted by size and type to make dressing your little one hassle-free. By having different sections for onesies, pajamas, and outfits, you can easily find what you need without rummaging through the entire drawer.

Sorting the clothes by size helps you locate the appropriate outfit swiftly, especially in the early morning hours or during middle-of-the-night diaper changes.

Keeping the clothes organized also helps in assessing which sizes the baby has outgrown and which ones need replenishment, streamlining your shopping list for the next clothing haul.

Drawer 2: Creating a Diaper Changing Station

The second drawer of the nursery dresser serves as a dedicated space for creating a practical and well-equipped diaper changing station, complete with essential diapering supplies, a changing pad, and a convenient diaper pail for easy disposal.

When setting up the diaper changing station, it’s important to organize the drawer efficiently. Utilize small baskets or dividers to separate diapers, wipes, diaper cream, and other supplies. This helps keep everything easily accessible when you’re in the midst of a diaper change.

Place a well-padded changing pad on top of the dresser to provide a comfortable and hygienic surface for your baby. Opt for a wipeable and waterproof pad for convenience.

Consider placing a diaper pail nearby to easily dispose of soiled diapers. Choose a pail that effectively contains odors and is easy to open and close with one hand.

Drawer 3: Organizing Baby Health and Grooming Essentials

Drawer three of the nursery dresser is designated for organizing baby health and grooming essentials in a well-labeled and easily accessible manner, ensuring that small items and necessary products are efficiently stored and readily available.

To start, use clear labels for each category, such as ‘medicine,’ ‘grooming,’ and ‘first aid,’ to facilitate quick identification. Utilize small baskets or drawer dividers to separate items like nail clippers, thermometers, and nasal aspirators.

Store frequently used items, like baby wipes and lotions, near the front for easy access. Consider using a small caddy to hold items that may need to be moved to different parts of the house. This method of organization will not only make your daily routines smoother, but it will also allow you to locate what you need at a moment’s notice.

Drawer 4: Storing Extra Blankets and Linens

Drawer four of the nursery dresser serves as the designated storage space for extra blankets and linens, ensuring that these items are neatly arranged and easily accessible whenever needed.

This accessible location makes it convenient to grab an extra blanket for a chilly night or to change the crib’s linens during late-night mishaps.

By dedicating this drawer specifically for these items, it helps to maintain a clutter-free environment, making it easier to find what you need without rummaging through various drawers. The efficient organization also ensures that the nursery looks tidy and welcoming, creating a peaceful setting for your little one.

Drawer 5: Maximizing Space with Overflow Drawers

Overflow drawers, such as drawer five, play a crucial role in maximizing space and accommodating additional items, ensuring that the nursery dresser remains organized and functional for various needs, including accommodating extra clothes and diaper changing essentials.

Drawer five, positioned conveniently within the dresser, offers ample space for storing overflow items, which helps in decluttering the top surface of the dresser.

This allows for easy access to frequently used items, creating a more efficient and organized nursery space.

The utilization of drawer five as an overflow storage solution enhances the functionality of the dresser, making it an essential part of a well-equipped and space-maximizing nursery setup.

Drawer 6: Utilizing Drawer Dividers and Organizers

Drawer six of the nursery dresser is optimized through the use of drawer dividers and organizers, ensuring that the available space is efficiently utilized to maintain order and accessibility for various baby essentials and items.

With drawer dividers in place, it becomes convenient to segregate different categories of clothing. This includes onesies, socks, and bibs, avoiding clutter and making it easier to locate specific items when needed.

Organizers further enhance the functionality by creating designated spaces for diapers, creams, and other essential supplies. This promotes a well-organized and efficient nursery environment.

These dividers and organizers not only aid in efficient space utilization, but also contribute to the overall safety of the nursery. They minimize the risk of items getting jumbled up and posing a hazard to the baby.

Additionally, they enable parents to maximize the storage capacity of the drawer. This allows for a wide range of baby essentials to be accommodated without sacrificing accessibility or order.

Additional Tips for Nursery Dresser Organization

Along with the designated drawers, implementing additional tips for nursery dresser organization can further enhance the overall functionality and accessibility of the storage space. These tips encompass utilizing labels, optimizing the diaper changing area, and employing efficient drawer organizers and dividers for maintaining well-organized clothes and baby essentials.

Labels play a significant role in ensuring that each item has its own designated spot, making it easier to locate and store items efficiently. Consider using clear, adhesive labels that can be easily attached to the front of each drawer. This allows for quick visual identification of the contents, saving time and hassle.

In terms of optimizing the diaper changing area, investing in a changing pad with integrated storage pockets can be a game-changer. This compact yet functional accessory provides convenient storage for diapers, wipes, and other essential baby care items, ensuring everything is within arm’s reach during changing times.

Efficient drawer organizers and dividers are essential for maintaining a clutter-free nursery dresser. Consider using adjustable dividers to customize the drawer space according to your needs, whether it’s for tiny socks and accessories or larger clothing items. This helps maximize the use of space and keeps everything neatly separated.

Using the File Folding Method for Clothing

The file folding method offers an efficient approach to organizing baby clothes within the dresser, optimizing space and visibility, and allowing for easy access to different clothing items as needed.

Utilizing Drawer Organizers for Similar Items

Drawer organizers are valuable tools for arranging similar items within the nursery dresser, ensuring that various baby essentials and products are grouped efficiently and neatly for easy retrieval.

Displaying Pacifiers for Easy Access

Displaying pacifiers in a designated section of the dresser facilitates easy access and retrieval, ensuring that these small items are readily available for the baby’s needs.

Creating a Changing Station atop the Dresser

Establishing a changing station atop the dresser provides a convenient and functional area for diaper changes, ensuring that the necessary supplies and a comfortable changing pad are readily available for seamless diapering routines.

Utilizing Adjacent Space for Extra Gear

Utilizing the adjacent space near the nursery dresser for storing extra gear and supplies optimizes accessibility and ensures that additional items are readily available when needed.

Implementing Labeling for Easy Identification

Implementing labeling for various sections and compartments within the nursery dresser facilitates easy identification and retrieval of small items and essential baby products, streamlining the overall organization process.

Conclusion: Optimizing Baby Dresser Organization

In conclusion, optimizing baby dresser organization is a fundamental aspect of maintaining a functional and well-organized nursery space, ensuring that diaper changes, changing stations, and drawer dividers are efficiently utilized for seamless baby care routines.

More Nursery Organization Ideas

Explore additional nursery organization ideas that complement and enhance the overall dresser organization, ensuring that baby clothes, storage items, and the top drawers are efficiently utilized for an organized and accessible nursery setup.

Consider incorporating labeled storage baskets or bins within the top drawers to categorize and separate different types of baby clothes, such as onesies, pajamas, and socks.

Utilize dividers or small organizers to maintain the order and create designated sections for specific items. Using hanging organizers on the back of the nursery door can provide extra storage space while keeping frequently used items easily accessible.

Another efficient approach is to utilize clear storage containers for items that are not in immediate use. This allows you to see the contents without having to open each container, saving time and effort.

Make use of under-the-crib storage bins for bulkier items or seasonal clothing, maximizing the available space and keeping the nursery clutter-free.

Frequently Asked Questions

How do I start organizing my baby’s dresser?

The first step to organizing your baby’s dresser is to empty it completely. This will allow you to see all of the items you have and start fresh with a clean and organized space.

What should I do with clothes that don’t fit my baby anymore?

If your baby has outgrown certain clothes, it’s best to either donate them or pack them away in a storage bin for future use. This will free up space in the dresser for current clothing items.

Should I separate clothes by size or type?

It’s a personal preference, but organizing clothes by size can be helpful in easily finding items that fit your baby. You can also choose to separate by type, such as having a section for onesies, sleepers, and outfits.

How can I make the most of the dresser space?

Utilize drawer dividers or organizers to create separate sections for different types of clothing. This will maximize space and make it easier to find what you need.

What should I do with baby accessories?

It’s best to designate a specific drawer or bin for baby accessories such as socks, hats, and bibs. This will keep them organized and within easy reach when needed.

How often should I reorganize the baby’s dresser?

It’s a good idea to reorganize the dresser every few months as your baby grows and their clothing needs change. This will also help to keep the dresser from becoming too cluttered.

Categories
Uncategorized

This Is How To Properly Fold Baby Clothes

In the busy world of parenthood, every minute counts – including the time spent on laundry and folding clothes.

Whether you’re a new parent or an experienced caregiver, mastering the art of folding baby clothes is a skill that can bring order and convenience to your daily routine.

So, let’s get started on creating a neatly folded and easily accessible baby wardrobe!

Key Takeaways:

  • Properly folding baby clothes helps keep them organized and prevents wrinkles and damage.
  • All you need to fold baby clothes is a flat surface and your hands, but having drawer dividers and clear bins can make the process easier.
  • Tips for folding baby clothes include sorting by size and type, using baby-safe detergent, and considering alternative folding methods like rolling.

Why Is It Important To Fold Baby Clothes Properly?

Properly folding baby clothes is essential for efficient organization, maximizing storage space, and simplifying the process of choosing outfits for your little one. It also helps in maintaining the condition of the garments and utilizing the available storage space effectively.

When babies are in the picture, every inch of space matters.

Folding baby clothes in a methodical manner not only conserves precious space but also reduces clutter, making it easier to locate specific items in the sea of tiny garments.

By neatly arranging onesies, pants, and onesies, you create a well-ordered system that optimizes every inch of your drawers or shelves, ensuring quick access to any item when the need arises.

When clothes are folded neatly, it aids in preserving them in good condition, preventing wrinkles, and minimizing the chances of damage caused by careless handling.

What Are The Materials Needed To Fold Baby Clothes?

Folding baby clothes requires minimal materials, including drawers, clear bins, and drawer organizers to facilitate an organized and methodical approach. Using a reliable baby laundry system and following a specific fold method, such as the KonMari method, can enhance the overall efficiency of the process.

In terms of storage solutions, the use of drawers and clear bins is advantageous since it allows for easy visibility of the clothes while minimizing the chances of clutter. Drawer organizers come in handy to separate different clothing items neatly, making it easier to find specific pieces when needed.

A reliable baby laundry system is crucial for maintaining a clean and organized wardrobe. Adopting specific fold methods like the KonMari method not only saves space but also keeps clothes wrinkle-free and easily accessible.

How To Fold Baby Clothes?

Folding baby clothes involves a systematic process to ensure neat and space-efficient storage. From folding the sleeves and pants to organizing onesies and socks, following a specific fold method, such as the traditional folding method or the KonMari method, can simplify the task and optimize storage space.

Start by laying the baby shirt with the front side down on a flat surface. Smooth out any wrinkles to ensure a clean fold. Fold each sleeve towards the center of the shirt, creating a straight line along the side of the shirt. Fold the bottom of the shirt up to meet the collar, creating a tidy rectangle.

For baby pants, fold them in half lengthwise, ensuring that the legs are perfectly aligned. Then, fold them in half horizontally, resulting in a compact square.

In terms of onesies, lay them flat and fold in the sides to form a long rectangle. Then fold the top and bottom toward the center to create a small, space-saving package.

For baby socks, tuck one sock into the other to keep them together, and then either fold or roll them for storage.

Lay Out The Clothes Flat

To begin the folding process, lay out the baby clothes flat on a clean and spacious surface, ensuring that each garment is free from wrinkles and ready for the subsequent folding steps.

Having a clean and spacious surface is crucial as it prevents the clothes from getting wrinkled and makes the folding process much more manageable. It’s essential to create a smooth foundation to avoid any unnecessary frustrations or challenges that may arise during the folding process.

An organized and tidy workspace also ensures that the clothes are neat and presentable once folded, which is especially important when dealing with delicate baby garments. By preparing the clothes properly, you set the stage for efficient folding and a well-organized baby wardrobe.

Fold The Sleeves In

Next, fold the sleeves of the baby clothes inwards, creating a clean and uniform appearance, especially for garments like baby T-shirts that require careful attention to detail for a neat fold.

Start by laying the baby T-shirt on a flat surface with the sleeves extended outward.

Then, smooth out the sleeves to remove any wrinkles or creases.

After that, bring one sleeve over the chest area, aligning it with the shoulder seam.

Repeat the same process with the other sleeve, creating parallel lines and ensuring symmetry.

Press the fold firmly to maintain its shape.

Fold The Bottom Of The Shirt Up

After folding the sleeves, proceed to fold the bottom of the shirt upwards, aligning the edges carefully to maintain a neat and space-saving fold using a suitable folding method.

One efficient method for creating a tidy fold at the bottom of the shirt is the flip-and-fold technique. Begin by flipping a portion of the shirt about one-third from the bottom, then fold the flipped section neatly upwards, aligning the lower edge with the collar to ensure a uniform finish.

Alternatively, for a more structured approach, utilize the Marie Kondo folding method. Lay the shirt flat, fold the sides inward, then create a series of small folds towards the center, resulting in a compact and space-efficient fold.

Fold The Shirt In Half

Following the previous step, fold the shirt in half, utilizing a suitable folding method, such as the KonMari folding method, to create a compact and easily stackable garment for efficient storage.

When folding the shirt in half using the KonMari method, begin by laying the shirt flat with the front side facing down. Smooth out any wrinkles to ensure a neat finish.

Next, fold one side of the shirt towards the center, ensuring that the sleeve lays flat and parallel to the shirt’s body. Repeat the same process with the other side, ensuring that the shirt is folded neatly with sharp creases. This method not only saves space but also allows for easy identification of garments, enabling a more organized closet or drawer arrangement.

Fold The Pants In Half

For baby pants, the next step involves folding the garment in half, employing a suitable fold method, such as the KonMari folding method, to create a space-efficient and easily accessible storage solution.

Using the KonMari folding method for baby pants optimizes space and makes it easier to access the garments. Start by laying the pants flat and smoothing out any wrinkles. Then, fold one leg over the other, ensuring that the waistband lines up neatly. Next, carefully fold the legs up toward the waistband to create a compact and uniform rectangle.

This method is particularly effective for organizing small articles of clothing, such as baby pants, in drawers or storage bins. It not only saves space but also allows you to see all the garments at a glance, making it convenient to pick out the desired item without disrupting the rest of the folded garments.

Fold The Onesie

When folding onesies, ensure a systematic approach that aligns with a chosen fold method and accommodates the requirements of the baby laundry system for efficient organization and storage.

Start by spreading the onesie flat on a clean, flat surface to smoothen out any wrinkles.

For the Marie Kondo fold method, fold the sides of the onesie towards the center, then follow by folding up the bottom to form a rectangle.

Alternatively, for a roll fold method, start by rolling the onesie from the bottom, tucking in the sleeves as you go.

After selecting a fold method, consider creating designated sections in the drawer or storage area to sort and stack the folded onesies by size and use. This not only maintains organization but also simplifies the process of retrieving a specific onesie when needed.

Fold The Socks

Conclude the folding process by neatly organizing the baby socks using a traditional folding method and incorporating suitable drawer organizers for systematic and space-efficient storage.

To properly store the folded baby socks, consider utilizing drawer dividers or compartmentalized organizers. These organizers help keep the socks separated by size or color, making it easy to locate a pair when needed. You can also utilize small baskets or bins within the drawers to further categorize the socks based on different fabric types or patterns, ensuring a well-organized storage system. By incorporating these storage solutions, you can efficiently manage the baby socks and maintain a clutter-free dresser or closet.

How To Store Folded Baby Clothes?

Storing folded baby clothes can be efficiently achieved through the use of suitable storage solutions such as drawer dividers, hanging shelves, and clear bins, ensuring optimal utilization of space within the baby closet or designated storage area.

Drawer dividers provide a tidy and organized way to separate different clothing items such as onesies, sleepwear, or tiny accessories, making it easier to locate specific items without rummaging through piles of clothes. Hanging shelves are ideal for maximizing vertical space; they allow for easy access to outfits while keeping them wrinkle-free.

Clear bins, on the other hand, offer visibility, ensuring that parents can identify the stored clothes quickly.

Use Drawer Dividers

Utilizing drawer dividers is a practical approach to categorize and store folded baby clothes, ensuring easy access and efficient organization within the available storage space with the incorporation of suitable drawer organizers.

Drawer dividers offer a myriad of benefits for parents looking to streamline the storage of their baby’s clothes. By segmenting the space within the drawers, each clothing category can be assigned a specific compartment, allowing for easy identification and retrieval of items.

The integration of suitable organizers facilitates a clutter-free environment and maximizes the utility of the closet or dresser. With this method, parents can easily locate onesies, pants, socks, and other baby essentials without disturbing the entire arrangement of folded clothes.

Utilize Hanging Shelves

Hanging shelves provide a convenient storage solution for items like baby dresses and other hanging garments, optimizing vertical space and ensuring a well-organized and accessible storage system within the baby closet or designated area.

By utilizing hanging shelves, parents can make the most of the available closet space, keeping baby dresses, rompers, and other hanging garments neatly arranged and easily accessible. This not only creates a visually appealing and tidy storage area but also allows for efficient organization, eliminating the need for bulky dressers or drawers that can take up valuable floor space.

These storage solutions also facilitate proper ventilation, helping to keep delicate fabrics fresh and well-aired, thus extending the lifespan of the clothing items. The ability to adjust the shelving heights allows for flexibility in accommodating different sizes of garments, making it an ideal solution for growing wardrobes.

Use Clear Bins

Clear bins offer a transparent and space-efficient storage solution for neatly organizing folded baby clothes, ensuring easy visibility and quick access to the garments while maximizing the available storage space.

These clear bins are ideal for keeping baby clothes neatly folded and accessible. The transparent design allows for effortless identification of the contents without the need to rummage through multiple containers. By utilizing clear bins, parents can easily create an organized and visually appealing storage system, ensuring that no item is overlooked. These bins can be easily stacked, placed on shelves, or integrated into storage organization solutions, significantly optimizing the available space.

What Are Some Tips For Folding Baby Clothes?

Efficiently folding baby clothes can be enhanced by sorting them by size and type, using baby-safe detergent, considering rolling as an alternative to folding, and labeling bins or drawers for easy identification and organization.

When sorting baby clothes, separate them by size and type to make it easier to grab what you need quickly. For cleaning, consider using a baby-safe detergent to ensure that the fabrics stay soft and gentle on your baby’s skin. If you find folding clothes challenging, rolling is a great alternative method, especially for items like onesies and sleepers. Labeling bins or drawers can further streamline the process, helping you find items easily and maintain order in the baby’s wardrobe.

Sort Clothes By Size And Type

Sorting baby clothes by size and type is a foundational step that facilitates efficient organization and simplifies the process of selecting specific garments, especially when combined with a systematic folding method and appropriately labeled storage bins.

By categorizing bodysuits, onesies, sleepers, and outfits according to their size and style, parents can easily identify the suitable pieces for their baby’s needs. Implementing space-saving fold techniques such as the KonMari method or the Marie Kondo fold can further maximize storage and create visually appealing sets of baby clothes. This meticulous approach not only saves time but also ensures that each piece is cared for appropriately, minimizing unnecessary wear and tear.

Use Baby-Safe Detergent

Selecting and using baby-safe detergent is crucial for maintaining the quality and comfort of baby clothes, ensuring a gentle and effective cleaning process that aligns with the requirements of the baby laundry system and the designated storage method.

As babies have delicate skin, it’s essential to use a detergent that is free from harsh chemicals and fragrances. Baby-safe detergents are specifically formulated to be gentle on the skin while effectively removing tough stains and odors from baby clothes. This is particularly important as babies tend to have sensitive skin that can easily react to residues left by regular detergents, causing discomfort and potential skin irritation.

The baby laundry system needs special attention to ensure that the clothes are thoroughly cleaned and remain soft. Using a detergent specifically designed for baby clothes helps to maintain the integrity of the fabrics, preserving their softness and reducing the risk of irritation against the baby’s delicate skin.

The designated storage method for baby clothes plays a significant role in maintaining their quality. Cleaned with a baby-safe detergent, properly storing the clothes, such as in breathable fabric organizers or air-tight containers, can prevent dust, moisture, or potential allergens from affecting the clothes, ensuring they remain fresh and comfortable for the baby to wear.

Consider Rolling Instead Of Folding

In certain cases, considering rolling as an alternative to folding can offer space-efficient and easily accessible storage solutions, especially when combined with suitable drawer organizers and space-saving storage methods.

Rolling items such as clothes, linens, and even certain types of furniture can help maximize storage space, as it reduces air pockets and creases, allowing for a more compact arrangement within drawers, closets, or storage containers. These rolled items are also easily visible and accessible, needing minimal reorganization when searching for specific pieces.

By integrating rolling techniques along with space optimization strategies, individuals can make the most of their available storage space. This may involve using vertical storage options, like rolling carts or shelving units, which can efficiently utilize otherwise underutilized areas.

Label Bins Or Drawers

Labeling bins or drawers ensures clear identification and organization, streamlining the process of accessing specific baby clothes and maintaining an efficiently managed storage system within the designated space.

When labeling bins or drawers, it provides a quick visual reference, making it easier for caregivers to find what they need without rummaging through heaps of clothes. Whether it’s onesies, pajamas, or tiny socks, a well-organized storage system brings efficiency and convenience, especially during those hectic early hours.

When specific categories are clearly marked, it simplifies the process of rotating seasonal clothing or passing items on to younger siblings. Utilizing clear labels contributes to a streamlined organization, enabling seamless transitions and ensuring that everything has its place.

Categories
Uncategorized

This Is How To Properly Fold a Cloth Nappy

Cloth nappies, also known as cloth diapers, have been making a comeback in recent years as eco-conscious parents look for sustainable and cost-effective alternatives to disposable diapers.

We’ll start by delving into what exactly a cloth nappy is and why more and more parents are choosing them over disposable options. Next, we’ll take a closer look at the various types of cloth nappies available, from traditional flat and prefold nappies to modern pocket and all-in-one designs.

By the end of this article, you’ll be equipped with all the knowledge you need to confidently embrace cloth nappies as a sustainable and practical choice for your baby.

So, let’s dive in and explore the world of cloth nappies together.

Key Takeaways:

  • Properly folding a cloth nappy depends on the type of nappy you are using. Different types of cloth nappies have different folding methods.
  • Securing a cloth nappy can be done using snaps, velcro, or pins/snappis. Ensure proper fit and snugness for leak-proof protection.
  • Properly washing and caring for cloth nappies is important for maintaining their absorbency and longevity. Follow manufacturer’s instructions and use gentle, eco-friendly detergents.

What Is A Cloth Nappy?

A cloth nappy, also known as a cloth diaper, is a reusable alternative to traditional disposable diapers, commonly used for infants and toddlers.

One of the prominent advantages of cloth nappies is their positive impact on the environment. Unlike disposable diapers, which contribute significantly to landfills and take hundreds of years to decompose, cloth nappies are washable and can be reused multiple times. This not only reduces waste but also minimizes the environmental footprint associated with diaper management.

The cost savings are substantial, as cloth nappies can be used for multiple children and may even be resold or repurposed after use, making them a sustainable and economical choice for newborn care routines.

Why Use Cloth Nappies?

Cloth nappies offer several advantages over disposable options, including reduced environmental impact, cost savings, and minimized exposure to potentially harmful chemicals.

Regarding environmental impact, cloth nappies significantly reduce the amount of household waste generated, as they can be reused for multiple children or repurposed. This results in fewer disposable diapers ending up in landfills, contributing to a healthier planet for future generations.

The cost savings associated with cloth nappies are notable, especially when considering the long-term use and potential for reuse. Families can save a substantial amount of money by investing in cloth nappies, making them a more financially sustainable and budget-friendly option compared to disposable counterparts.

The use of cloth nappies may offer potential health benefits for babies, as they are free from the chemicals present in some disposable diapers, reducing the risk of irritation or allergic reactions. This aspect is particularly appealing to many parents who prioritize baby comfort and well-being.

What Are The Different Types Of Cloth Nappies?

There are various types of cloth nappies available, catering to different preferences and usage scenarios, including flat prefold cloth diapers, fitted cloth nappies, and pocket cloth nappies.

Flat prefold cloth diapers are versatile and economical, requiring folding before use and often secured with pins or snappi fasteners.

Fitted cloth nappies offer excellent absorbency and snug fit, with elasticized legs for leak protection, making them ideal for overnight use.

Pocket cloth nappies feature an outer waterproof layer and a pocket for inserting absorbent inserts or liners, providing customizable absorbency based on the baby’s needs.

Flat Cloth Nappies

Flat cloth nappies, also known as flat diapers, are versatile and customizable, requiring manual folding and shaping to fit the baby snugly.

Parents can find numerous folding techniques, such as the angel wing fold, origami fold, and jelly roll fold, each catering to different baby sizes and needs. The versatility of flat cloth nappies extends beyond diapering – they can be repurposed as burp cloths, changing pads, or even household cleaning rags. With their breathable and leak-resistant properties, these nappies are becoming a preferred choice for eco-conscious parents, reducing landfill waste and offering significant cost savings over time.

Prefold Cloth Nappies

Prefold cloth nappies, also known as prefold diapers, offer convenient pre-folding options and can be secured using various folding techniques such as the angel wing fold and jelly roll fold.

One of the key features of prefold cloth nappies is their versatility. They are especially suitable for newborns due to their adjustable sizing options, ensuring a snug and comfortable fit. The angel wing fold is practical for containing messes, whereas the jelly roll fold is effective for preventing leaks. These nappies are easy to clean and quick to dry, making them a popular choice for eco-conscious parents.

Fitted Cloth Nappies

Fitted cloth nappies provide contoured, snug-fitting designs that eliminate the need for additional folding and can be secured with waterproof covers, ensuring a leak-resistant diapering experience for newborns and young babies.

These tailored cloth nappies are specifically designed to provide a customized fit for babies, offering a high level of comfort and security. Their snug fit helps in containing messes effectively, while the use of waterproof covers further enhances their leak-proof properties, making them an ideal choice for overnight or extended wear.

The tailored fit also ensures that the nappies stay in place during active movements, providing flexibility and freedom of movement for the baby. The compatibility with diaper covers enables additional protection and customization, as parents can choose from a variety of cover designs and materials to suit their preferences and baby care routines. The presence of elasticized leg openings and back waist ensures a secure and comfortable fit without leaving red marks or causing discomfort to the baby’s delicate skin. With their contoured shape, fitted cloth nappies are ideal for newborn care, gently molding to the baby’s body and offering a snug yet gentle embrace.

Pocket Cloth Nappies

Pocket cloth nappies feature a pocket-style design that allows for customizable stuffing of absorbent inserts, making them ideal for on-the-go diapering and storage in a diaper bag.

Plus their stuffing mechanism, the pocket cloth nappies come with a portable design, which is perfect for parents who are often on the move. The ability to customize the level of absorbency by adjusting the stuffing makes them effortlessly adaptable for different times of the day and sleep schedules. This adds to the practical application of these nappies in managing the varying needs of infants and toddlers.

All-In-One Cloth Nappies

All-in-one cloth nappies provide a convenient, all-inclusive solution for diapering, incorporating absorbent layers and waterproof covers in a single, easy-to-use design, making them suitable for various folding techniques such as the airplane fold.

These nappies are particularly beneficial for newborns, as they eliminate the need for separate inserts or covers, streamlining the changing process for caregivers. They are designed with adjustable sizing to grow with the baby, ensuring a secure and comfortable fit, which is essential for preventing leaks and maintaining the baby’s skin health.

Industry endorsements for their effectiveness and eco-friendly nature have made them a preferred choice for many parents seeking sustainable baby care options.

How To Properly Fold A Cloth Nappy?

Mastering the art of properly folding a cloth nappy is essential for ensuring a secure and comfortable fit, with popular folding methods including the pad fold, newspaper fold, and bikini fold.

While the pad fold is a versatile option that creates multiple layers of absorbency, making it suitable for nighttime use, the newspaper fold provides a trim fit for smaller babies and can be easily adjusted for customization.

On the other hand, the bikini fold is ideal for newborns, offering front-to-back padding and containment, which is essential during the early months when frequent diaper changes are necessary.

Folding a Flat Cloth Nappy

Folding a flat cloth nappy can be done using various techniques, such as the triangle fold, kite fold, or origami fold, allowing for customizable and secure diapering solutions.

Each folding method offers unique advantages. The triangle fold involves folding the cloth into a triangle and securing it around the baby’s waist, providing a snug fit and excellent containment for messes. The kite fold, on the other hand, creates a longer, rectangular shape, which is particularly suitable for infants as it provides extra layers in the front for added absorbency.

Another fascinating technique is the origami fold, which involves intricate folding to form a slim, pad-like shape that can be adjusted as per the baby’s size and needs. Parents can choose the method that best suits their baby’s unique requirements, whether it be a heavy wetter, a newborn, or an active toddler. These folds can also be customized further by adding boosters or inserts to enhance absorbency, thus providing an eco-friendly and cost-effective diapering solution.

Folding a Prefold Cloth Nappy

Folding a prefold cloth nappy requires mastering various folding techniques, such as the jelly roll fold, to ensure a secure and comfortable fit for the baby.

Another popular method is the angel wing fold, where you can easily adjust the absorbency in the front or back depending on your baby’s needs. For parents looking for a quick and straightforward approach, the pad fold is a great option. This fold allows for easy customization and quick changes, making it ideal for busy parents.

Expert nappy advisors often recommend the bikini twist technique for its simplicity and effectiveness. It provides a snug fit around the legs, reducing the risk of leaks and ensuring maximum comfort for the little one. Remember to experiment with different folds to find the one that works best for you and your baby’s needs.

Folding a Fitted Cloth Nappy

Folding a fitted cloth nappy involves utilizing specific folding methods such as the angel wing fold and jelly roll fold to ensure a snug and tailored fit for the baby.

These folding techniques are essential for creating a comfortable and leak-resistant diapering solution.

The angel wing fold offers a simple yet effective way to fold the nappy, providing excellent coverage for the baby’s back and bottom. On the other hand, the jelly roll fold is particularly beneficial for containing newborn’s runny messes, establishing a secure barrier around the legs.

With the diverse options in folding, parents can find a method that suits their baby’s unique needs and preferences, while also maximizing the absorbency and containment capabilities of the fitted cloth nappy.

Stuffing a Pocket Cloth Nappy

Stuffing a pocket cloth nappy with absorbent inserts is a crucial step in preparing them for use, making them suitable for various folding techniques such as the diaper bag fold and airplane fold.

To begin, ensure that the pocket opening is fully turned outwards for easy access to the interior. Then, select the appropriate absorbent inserts based on your baby’s needs – whether for daytime or nighttime use. Lay the insert lengthwise, then fold it according to the desired level of absorbency. Once folded, carefully stuff the insert into the pocket opening, making sure it lays flat and evenly distributed. This process not only enhances the nappy’s absorbency but also ensures a snug fit and leak-proof protection for your little one.

Using an All-In-One Cloth Nappy

Using an all-in-one cloth nappy involves leveraging its integrated design, requiring minimal additional steps for diapering and eliminating the need for separate waterproof covers.

These modern cloth nappies feature built-in absorbent layers and waterproof outer materials, making them a convenient option for busy parents. The all-in-one design simplifies the diaper change process, as there’s no need to assemble different components or worry about matching inserts with covers.

The cost savings associated with using all-in-one cloth nappies are significant. They are reusable, reducing the ongoing expenses related to disposable diapers. Families can save a considerable amount over time, especially when considering the cost of purchasing disposable diapers on a regular basis.

From an environmental standpoint, all-in-one cloth nappies contribute to reducing waste. By choosing reusable nappies, parents minimize the environmental impact of diapering. This sustainable choice helps lessen the amount of disposable diapers ending up in landfills, thus playing a role in preserving the environment for future generations.

How To Properly Secure A Cloth Nappy?

Properly securing a cloth nappy is vital for ensuring a snug and leak-resistant fit, with options including using Snappi fasteners, Velcro, or traditional pins for secure closure.

Snappi fasteners offer a convenient and safe way to secure cloth nappies without the need for sharp pins. Simply stretch the Snappi fastener over the fabric, creating a snug and secure hold. Velcro closures, on the other hand, provide an adjustable and easy-to-use option, allowing for quick and hassle-free fastening. For parents who prefer the traditional approach, diaper pins can be used with caution, ensuring they are securely fastened away from the baby’s skin. Whatever the choice, making sure to cover the nappy with a waterproof cover is essential to prevent leaks and maintain dryness.

Using Snaps

Using snaps for securing cloth nappies offers a hassle-free and adjustable closure solution, ensuring a comfortable and customizable fit for the baby during diapering.

Snaps provide a quick and reliable way to fasten cloth nappies, eliminating the need for pins or adhesive tapes that can be cumbersome and potentially unsafe. The adjustable nature of snaps allows for a secure yet flexible closure, accommodating the baby’s movements without causing discomfort.

Snaps make changing nappies a breeze, saving time and effort for busy parents. Their durability and long-lasting quality ensure that they can withstand frequent use, making them a cost-effective choice. Plus the convenience they offer, snaps contribute to reducing waste and environmental impact, aligning with sustainable diapering practices.

Using Velcro

Utilizing Velcro for securing cloth nappies provides a convenient and adjustable fastening option, offering ease of use and quick adjustments during diaper changes.

It is a practical choice for caregivers as it allows for a snug fit without the need for pins or complicated folding techniques. The user-friendly nature of Velcro makes it an ideal choice for busy parents and childcare providers.

The adjustable nature of Velcro closures ensures a secure and comfortable fit for babies of all sizes, eliminating the hassle of constantly purchasing different sizes of nappies. This simplicity and convenience greatly enhance the overall baby care experience, enabling caregivers to focus on the comfort and well-being of the little ones without worrying about complicated fastening mechanisms.

Using Pins or Snappis

Traditional pins or modern Snappis can be utilized for securing cloth nappies, providing reliable and adjustable closure options for ensuring a secure fit during diapering.

Cloth nappies have witnessed a resurgence in popularity due to their eco-friendly and cost-effective nature. When securing cloth nappies, Snappis are particularly beneficial for parents as they eliminate the risks associated with traditional pins. These modern, T-shaped fasteners have stretchable arms that embrace the nappy, delivering a snug and secure closure. This secure fastening mechanism prevents leaks and ensures that the nappy stays in place, offering peace of mind to parents during the day and throughout the night.

How To Properly Wash And Care For Cloth Nappies?

Properly washing and caring for cloth nappies is essential to maintain their functionality and hygiene, requiring specific laundering practices, appropriate storage, and disposal of waste.

When laundering cloth nappies, it is important to rinse off any solid waste into the toilet before storing them in a dedicated nappy pail or wet bag. It’s recommended to wash them every 2-3 days to prevent odors and stains from setting in.

Use a gentle, eco-friendly detergent free of additives and fragrances to avoid irritation and maintain absorbency. Select a warm or hot water wash cycle, followed by an extra rinse to ensure thorough cleaning. Avoid using fabric softeners or bleach as they can degrade the fabric and affect the nappies’ effectiveness.

Categories
Uncategorized

This Is How To Properly Fold a Jacket

Properly folding a jacket may seem like a simple task, but it can make a significant difference in maintaining the quality and appearance of your outerwear.

In this comprehensive guide, we will delve into the importance of correctly folding a jacket, the materials and tools you need, the types of jackets that can and should not be folded, and the step-by-step process of folding a jacket to prevent wrinkles and damage.

Whether you’re a fashion enthusiast or simply want to maintain the longevity of your jackets, this article will equip you with the knowledge and skills needed to master the art of jacket folding.

Key Takeaways:

  • Properly folding a jacket helps maintain its shape and appearance, making it easier to wear and preventing wrinkles.
  • The only materials and tools needed to fold a jacket are the jacket itself and a flat surface. Not all types of jackets can be folded, so it is important to know which ones to avoid.
  • To properly fold a jacket, lay it flat, fold the sleeves, tuck in the sides, and fold the bottom up. There are also different folding techniques such as the military roll and suitcase fold.

Why Is It Important to Properly Fold a Jacket?

Properly folding a jacket is essential for maintaining its pristine condition, preserving the fabric, and ensuring a wrinkle-free appearance, especially for individuals with a meticulous approach to wardrobe organization such as Caitlin Jaymes from Los Angeles.

When a jacket is haphazardly thrown over a chair or crammed into a closet, it risks becoming creased, resulting in an unkempt appearance. By folding it correctly, you extend the lifespan of the garment, reduce the need for ironing, and showcase a polished look.

In wardrobe organization, the proper folding of jackets contributes to creating a cohesive and neat closet space. The careful treatment of fabrics demonstrates a commitment to preserving the investment in your clothing collection.

What Materials and Tools Do You Need?

To properly fold a jacket, you will need materials and tools such as high-quality hangers, garment bags, and fabric-friendly folding boards, especially for individuals in the fashion industry like Caitlin Jaymes, a renowned Fashion Stylist and PR professional involved in Fashion Design.

High-quality hangers are essential to maintain the shape of the jacket and prevent wrinkles. Garment bags protect the jacket from dust and moisture, especially during storage or travel, while also allowing for easy organization and visibility in a closet or wardrobe. Fabric-friendly folding boards provide a smooth, neat fold without causing any creases or damage to the fabric.

For professionals like Caitlin Jaymes, ensuring the impeccable presentation of jackets and garments is crucial for their work in Fashion Styling and PR. These tools not only assist in maintaining the quality of the clothing but also contribute to the overall visual appeal and longevity of the pieces, aligning with the high standards of the fashion industry.

What Type of Jacket Can Be Folded?

Jackets suitable for folding include lightweight blazers, casual denim jackets, and unstructured outerwear commonly favored by celebrities and utilized in editorial shoots, as recommended by renowned Fashion Stylist Caitlin Jaymes who frequently works with high-profile individuals and editorial publications.

Lightweight blazers are a versatile option, often worn by celebrities for red carpet events and interviews. Their effortless style and lightweight material make them perfect for folding and traveling.

Similarly, casual denim jackets, a staple in street fashion, offer a laid-back appeal and are easily foldable for a fun day out.

Unstructured outerwear, as favored by fashion icons like Meghan Markle, offers a sophisticated yet relaxed look. These jackets are often featured in editorial shoots due to their versatility and ability to be effortlessly styled in various ways.

What Type of Jacket Should Not Be Folded?

Jackets that should not be folded include structured blazers, tailored suit jackets, and delicate fabrics often featured on renowned platforms such as HGTV, the Rachael Ray Show, and VoyageLA, as advised by Caitlin Jaymes, an expert in fashion organization and wardrobe management.

Structured blazers, with their defined shoulders, are best kept on hangers to maintain their shape and prevent creasing. Hanging them in a well-ventilated area helps to preserve the crisp lines and professional appearance.

Tailored suit jackets, a staple for a polished, sophisticated look, are prone to creasing and losing their tailored structure when folded. To keep them in top condition, it’s recommended to hang them using broad-shouldered hangers, ensuring they are well-supported.

Delicate fabrics, including silk, chiffon, or lace, require gentle care to avoid damage. Folding these jackets can lead to permanent creases and wrinkles, affecting the overall look and durability. Storing them on padded hangers or in garment bags helps maintain their delicate nature.

How to Fold a Jacket?

Folding a jacket involves specific steps such as laying the jacket flat, folding the sleeves, tucking the sides, and smoothly flipping it over, as demonstrated by renowned fashion influencer Caitlin Jaymes, who has shared her expertise on platforms like Liverpool Los Angeles and the Brother Snapchat Channel.

Caitlin Jaymes’ expertise in demonstrating the art of folding a jacket has been admired by her followers, with her detailed step-by-step guidance standing out as a valuable resource for fashion enthusiasts.

To begin, lay the jacket flat on a clean, flat surface, ensuring that it is evenly spread out to avoid any wrinkles or creases.

Next, fold the sleeves inwards, aligning them with the side of the jacket. Smooth out any wrinkles and ensure that the sleeves are neatly tucked to create clean lines.

Then, tuck the sides of the jacket towards the center, creating a streamlined shape and ensuring that the edges are aligned. This step contributes to a neat and compact final fold.

Smoothly flip the jacket over to reveal the neatly folded result, showcasing the professional touch inspired by Caitlin Jaymes’ demonstrations.

Step 1: Lay the Jacket Flat

Begin by laying the jacket flat on a clean, smooth surface, ensuring proper alignment and smoothness, a technique frequently emphasized by Caitlin Jaymes for efficient fashion organization and optimal wardrobe maintenance.

By laying the jacket flat, you create a stable foundation for the folding process, preventing creases and maintaining the integrity of the garment. It allows for a clear view of the entire jacket, making it easier to identify any wrinkles or areas needing attention. This step aligns with Caitlin Jaymes’s advice on maintaining the immaculate appearance of clothing, ensuring that your wardrobe reflects a meticulous and organized approach.

Step 2: Fold the Sleeves

Next, carefully fold the sleeves in a smooth and symmetrical manner, ensuring a neat appearance and efficient use of space, a technique endorsed by Caitlin Jaymes for streamlined fashion organization and optimized wardrobe storage.

When folding the sleeves, it’s essential to align them neatly along the jacket’s body to maintain a polished look. By following this method, you not only save space but also prevent wrinkles and creases, preserving the garment’s quality.

Caitlin Jaymes suggests a precise folding technique to avoid unnecessary bulges and maintain a cohesive wardrobe arrangement.

Step 3: Fold the Sides In

Gently tuck the sides of the jacket inwards, ensuring a compact and organized fold, a technique often favored for efficient wardrobe management by fashion influencers working with celebrities, such as Caitlin Jaymes.

Start by laying the jacket flat on a clean surface, ensuring that all the buttons are fastened.

Then, fold one side of the jacket towards the center, ensuring that the sleeve is aligned neatly with the shoulder seam.

Repeat the same step for the other side of the jacket, ensuring a symmetrical fold.

Smooth out any wrinkles and creases before storing or placing the jacket in your wardrobe to maintain its impeccable appearance.

Step 4: Fold the Bottom Up

Fold the bottom of the jacket upwards, creating a clean and tailored finish, a technique often showcased by Fashion PR professionals and featured on platforms such as HGTV, as recommended by industry expert Caitlin Jaymes.

Start by laying the jacket flat on a smooth surface, ensuring that the bottom edge is even and neat. Then, fold the fabric up along the natural hemline, using the edge of a ruler or a straight edge for precision.

Smooth out any wrinkles or creases, ensuring that the fold is even and lies flat against the body of the jacket. This technique creates a polished look that is often seen in high-end fashion magazines and showcased in tutorials by renowned stylists.

Step 5: Flip the Jacket Over and Smooth Out Any Wrinkles

Flip the jacket over and gently smooth out any wrinkles or creases, ensuring a flawless presentation, as demonstrated by fashion experts like Caitlin Jaymes, featured on notable platforms such as VoyageLA and Liverpool Los Angeles.

It is crucial to pay attention to the details during this step to achieve a professional-looking result. Experts often highlight the importance of creating a polished appearance when it comes to fashion, and the final step of jacket folding plays a significant role in achieving this. By following these meticulous techniques, you can confidently present your jacket with the finesse and style synonymous with top fashion experts, ensuring that it reflects your personal brand and sophisticated taste.

What Are the Different Ways to Fold a Jacket?

There are various methods for folding a jacket, including the basic fold, military roll, suitcase fold, and hanger fold, each offering unique advantages for efficient wardrobe organization and space management, as recommended by renowned Fashion Stylist Caitlin Jaymes.

The basic fold is widely used for its simplicity and suitability for a quick tidy up. It involves folding the jacket vertically in half and then horizontally in thirds. The military roll, on the other hand, provides wrinkle-free storage and compactness, ideal for traveling. Meanwhile, the suitcase fold is preferred for reducing creases and maximizing suitcase space. The hanger fold maintains the jacket’s shape and is suitable for hanging in closets.

Basic Fold

The basic fold method involves a simple and efficient approach to jacket folding, suitable for various types of outerwear favored by celebrities and frequently utilized in fashion design, as recommended by industry expert Caitlin Jaymes.

When utilizing the basic fold method, begin by laying the jacket on a flat surface with the front side facing down and the sleeves extended to the sides.

  • Next, fold one side of the jacket towards the center, ensuring that the sleeve rests neatly aligned with the body of the garment.
  • Then, repeat the process with the other side, creating a clean and symmetrical fold.

This method not only optimizes storage space but also minimizes wrinkles and creases, which is essential for preserving the quality of the outerwear, particularly in the realm of fashion design. Celebrities showcasing impeccably folded jackets further emphasize the importance of mastering this technique.

Military Roll

The military roll technique offers a compact and space-saving approach to jacket folding, often showcased by Fashion PR professionals and featured on platforms such as HGTV, as endorsed by industry expert Caitlin Jaymes.

When using the military roll, you begin by laying the jacket front side down with the sleeves outstretched. Next, fold one side of the jacket inwards, ensuring a straight and neat line along the collarbone. Then, repeat the process with the other side to create a symmetrical fold. Rolling the jacket from the bottom up, removing excess air as you go along, results in a tight and compact bundle. This method not only ensures efficient use of storage space but also minimizes creasing and wrinkling, making it an ideal technique for frequent travelers or those with limited closet space.

Suitcase Fold

The suitcase fold method provides a practical and organized approach to jacket folding, suitable for efficient wardrobe management and storage, often demonstrated by industry professionals and featured on influential platforms.

By utilizing the suitcase fold method, individuals can maximize the space within their closets and luggage, ensuring that clothing items remain wrinkle-free and easily accessible. This technique involves neatly folding the jacket into a compact rectangle, allowing for seamless stacking and arrangement within drawers or suitcases. The benefits of this method extend beyond just efficient utilization of space; it also facilitates quick and stress-free outfit selection, reducing the time spent rummaging through cluttered closets.

Professional stylists, like Caitlin Jaymes, emphasize the effectiveness of this approach, particularly when packing for travel or organizing seasonal wardrobes. With the suitcase fold method, individuals can streamline their clothing storage, maintain a tidy appearance, and gain a clear overview of their entire wardrobe, minimizing the chances of overlooking specific pieces. This method has gained recognition for its ability to promote orderliness and accessibility, making it a valuable technique advocated by industry experts.

Hanger Fold

The hanger fold technique offers a convenient and versatile approach to jacket folding, often demonstrated by experts on platforms like the Brother Snapchat Channel, providing tips for efficient wardrobe organization and maintenance, as showcased by Caitlin Jaymes.

This innovative method involves utilizing a hanger to effortlessly fold a jacket into a compact and wrinkle-free form. By following a few simple steps, individuals can achieve a neat and organized look for their jackets, saving valuable closet space and ensuring their garments remain in impeccable condition. With the guidance of industry experts, individuals can master this efficient technique and streamline their daily routine with ease.

The hanger fold method has garnered widespread recognition for its practicality and effectiveness, making it a valuable skill for anyone seeking to optimize their wardrobe management.

How to Store a Folded Jacket?

Once a jacket is folded, it can be stored in a drawer, suitcase, or on a shelf, depending on the available space and the individual’s wardrobe preferences, as advised by seasoned Fashion Stylist Caitlin Jaymes for efficient wardrobe organization and space management.

Effective wardrobe organization is vital for managing space efficiently and ensuring easy access to clothing items. Caitlin Jaymes recommends using drawers for folded jackets, as they keep them neatly organized and easily accessible. Alternatively, jackets can be placed in suitcases if storage space is limited or if they need to be packed for travel.

If you have ample vertical space, utilizing shelves can be a convenient option, providing a visible and accessible storage solution for your folded jackets.

In a Drawer

Storing a folded jacket in a drawer offers a space-efficient and organized solution, frequently utilized by fashion professionals involved in design and popular among celebrities, as recommended by industry expert Caitlin Jaymes.

By utilizing this method, individuals can optimize their storage space and maintain a tidy and clutter-free environment. It also allows for easy access to jackets, saving time and effort when selecting an outfit.

The convenience of storing jackets in drawers has made it a preferred choice among those who value efficient organization without compromising on style. Fashion enthusiasts and celebrities alike appreciate the neatness and accessibility this approach brings to their wardrobe.

In a Suitcase

Utilizing a suitcase for storing a folded jacket provides a portable and protective solution, often showcased by Fashion PR professionals and featured on platforms such as HGTV, as endorsed by industry expert Caitlin Jaymes.

When using a suitcase, it’s important to consider its size and material. The suitcase should be large enough to accommodate the folded jacket without causing excessive creasing or wrinkling. Additionally, protective features such as padded interiors or compression straps can safeguard the jacket from potential damage during travel.

Many fashion professionals display ingenious ways to maximize space within a suitcase for various garment types, and the portability of a suitcase makes it an ideal storage solution for jackets when on the go. HGTV often features these innovative packing and organization techniques, highlighting the practicality and versatility of using a suitcase for storing apparel.

On a Shelf

Placing a folded jacket on a shelf allows for visible and accessible storage, often demonstrated by experts on platforms such as Liverpool Los Angeles and the Brother Snapchat Channel, as recommended by industry expert Caitlin Jaymes.

When you store a folded jacket on a shelf, it not only keeps the space tidy but also ensures quick access when needed. This method is highly praised by industry authorities such as Caitlin Jaymes, who regularly advocates for practical and efficient storage solutions.

By following this technique, you can keep your jackets neatly organized in plain sight, making it easier to select the right option for your outfit without rummaging through closets or drawers.

How to Prevent Wrinkles When Folding a Jacket?

To prevent wrinkles when folding a jacket, it is essential to use proper tools, fold along natural creases, and store the jacket in a suitable location, as emphasized by experienced Fashion Stylist Caitlin Jaymes for effective wardrobe maintenance and wrinkle prevention.

When folding a jacket, it’s important to use a soft brush to remove any dust or debris to ensure a clean fold. Utilize a padded hanger to maintain the shape of the shoulders and prevent unwanted creases. Caitlin Jaymes recommends folding along the existing seams and natural creases of the jacket to retain its original structure and minimize wrinkles.

Categories
Uncategorized

This Is How To Properly Fold Shorts

Properly folding shorts may seem like a mundane task, but it can make a significant difference in keeping your wardrobe organized and maintaining the crisp, fresh appearance of your clothing. From choosing the right materials to mastering the folding technique, there are several essential steps to ensure your shorts are neatly and compactly folded.

In this article, we will explore the importance of properly folding shorts, the best materials for folding, the step-by-step process for achieving a perfect fold, and valuable tips for storing and avoiding common mistakes. Whether you’re a neat freak or simply seeking an efficient way to keep your shorts in pristine condition, this guide will provide you with the knowledge and skills needed to master the art of folding shorts.

Key Takeaways:

  • Properly folding shorts helps maintain their shape and prevent wrinkles.
  • Synthetic and lightweight materials are best for folding shorts.
  • To properly fold shorts, lay them flat, fold in half, then in half again, and finish by folding in the waistband and legs.

Why Is It Important To Properly Fold Shorts?

Properly folding shorts is essential to optimize storage space, prevent wrinkles, and maintain a neat and organized wardrobe.

Folding shorts in a systematic manner not only saves space but also contributes to a clutter-free environment. As a ADHD specialist, Stevens-Heebner underscores the impact of organized spaces on mental clarity and well-being. The insights from the National Association Senior Specialty Move Managers corroborate the benefits of a well-organized wardrobe in creating a seamless transition during relocations. By adopting the practices recommended by certified professionals, individuals can experience the holistic advantages of efficient storage solutions.

Folding shorts in a systematic manner not only saves space but also contributes to a clutter-free environment. As a ADHD specialist, Stevens-Heebner underscores the impact of organized spaces on mental clarity and well-being. The insights from the National Association Senior Specialty Move Managers corroborate the benefits of a well-organized wardrobe in creating a seamless transition during relocations. By adopting the practices recommended by certified professionals, individuals can experience the holistic advantages of efficient storage solutions.

What Materials Are Best Suited For Folding Shorts?

When considering the best materials for folding shorts, it’s essential to prioritize options suitable for a spring-summer wardrobe and align with effective folding techniques. Influenced by the KonMari fold method popularized by Marie Kondo, the choice of materials plays a pivotal role in compactly folding shorts without compromising fabric integrity.

Lightweight and breathable fabrics such as cotton, linen, and chambray are ideal for spring-summer shorts due to their comfort and versatility. These materials not only ensure comfortable wear during warm weather but also facilitate neat and efficient folding.

When practicing the KonMari fold method, the fabric’s pliability is crucial in achieving clean lines and minimizing creases. Opting for high-quality materials enhances the effectiveness of this folding technique, allowing the shorts to be neatly organized, whether in drawers or storage boxes.

What Are The Steps To Properly Fold Shorts?

The process of properly folding shorts involves a series of precise steps, including laying out the shorts flat, folding in half, folding in half again, folding in the waistband, and folding in the legs. These steps, inspired by folding techniques like the KonMari fold by Marie Kondo, ensure the ability to compactly fold and roll shorts to prevent wrinkles and optimize storage.

Lay Out The Shorts Flat

The initial step in properly folding shorts is to lay them out flat, ensuring a smooth surface for subsequent folding techniques. Inspired by Marie Kondo’s folding methods, this foundational step sets the stage for efficient and organized shorts storage.

By laying the shorts flat, you minimize wrinkles and creases, preserving the fabric and its appearance. This method also allows for easier identification of each pair of shorts, simplifying the process of selecting an outfit.

Additionally, laying shorts flat before folding creates consistency in the appearance of your folded clothes, enhancing the overall aesthetics of your wardrobe. Embracing techniques like the KonMari fold can further optimize this step and contribute to a visually harmonious and clutter-free dresser or closet.

Fold In Half

The next step in the shorts folding process entails folding them in half, a maneuver designed to compactly fold the garment and minimize storage space.

This technique is instrumental in maximizing storage space and organizing your wardrobe efficiently. By folding the shorts in half, you are setting the stage for a seamless rolling process, reducing the chances of wrinkles and creases in the fabric. Rolled shorts take up minimal room and can be neatly stacked or arranged in drawers, making it easier to access and choose from your collection.

This method can also contribute to maintaining garment quality, as it reduces the potential for excessive creasing and wear when the shorts are stored for extended periods.

Fold In Half Again

Following the initial fold, the subsequent step involves folding the shorts in half again, further optimizing the compactness of the garment for efficient storage.

This secondary fold plays a crucial role in achieving a greater level of compactness. By halving the garment again, the fabric layers are aligned, ensuring a neat and tidy appearance. Not only does this method facilitate effective clothing folding, but it also aids in minimizing creases and maintaining the integrity of the fabric. The technique of rolling shorts becomes much more efficient and practical due to this thoughtful approach to folding. As a result, the shorts are conveniently stored without compromising their quality.

Fold In The Waistband

Another crucial step in properly folding shorts is to fold in the waistband, ensuring a secure and uniform arrangement for enhanced wrinkle prevention. Numerous reader success stories attest to the efficacy of this technique in maintaining the pristine condition of stored shorts.

When you fold in the waistband, it not only keeps the garment in place but also minimizes stress on the fabric, which is essential for preserving the integrity of the shorts over time. By tucking the waistband neatly, you create a smooth foundation for the rest of the folding process, resulting in a neatly organized and compact bundle that fits neatly in your drawer or wardrobe.

Many individuals have noticed a considerable reduction in creases and folds when retrieving their shorts after implementing this method.

Fold In The Legs

The final step in properly folding shorts involves folding in the legs, culminating in a meticulously organized and wrinkle-resistant garment. Testimonials from readers underscore the efficacy of this method in preserving the pristine condition of folded and stored shorts.

By folding in the legs, you ensure that the fabric of the shorts remains smooth and free from unsightly creases. This method not only enhances the overall appearance of the garment but also contributes to maintaining its quality over time.

Many individuals who have adopted this technique have shared their satisfaction with the results, noting that their shorts look fresh and neatly arranged even after extended periods of storage. Some readers have affirmed that incorporating this step into their clothing care routine has simplified the process of selecting and wearing shorts, as they can retrieve them from the closet without having to deal with stubborn wrinkles or folds.

What Are Some Tips For Properly Folding Shorts?

To enhance the efficiency of shorts folding, several tips can be implemented, including the use of a folding board, hanging the shorts instead, and rolling the shorts for compact storage. Drawing inspiration from Marie Kondo’s KonMari fold, these tips offer varied approaches to suit individual preferences and space constraints.

When using a folding board, begin by laying the shorts flat and neatly aligned, then follow the folding board’s guidelines to create uniform, crease-free folds. Hanging shorts can prevent wrinkles and is an excellent space-saving option, especially for those with available closet space.

Incorporating the rolling technique, where the shorts are rolled tightly, not only saves space but also allows quick and easy access to specific pairs without disrupting the entire stack. Each method offers its advantages, catering to different organizational needs and preferences.

Use A Folding Board

Utilizing a folding board is a recommended technique for achieving precise and uniform shorts folding, facilitating efficient storage solutions and maintaining garment integrity. This method aligns with the goal of compactly folding shorts while optimizing available storage space.

By using a folding board specifically designed for shorts, individuals can ensure that each fold is consistent, resulting in a neat and organized appearance. The board provides a structured template, allowing the fabric to be neatly tucked and folded, preventing creases and wrinkles.

This precise folding technique not only saves time but also contributes to the overall neatness of the wardrobe. Efficiently folded shorts take up less space in drawers and closets, enabling individuals to maximize the available storage space and keep their clothing collection organized.

Hang The Shorts Instead

An alternative approach to shorts storage involves hanging the garments, offering a space-efficient solution that minimizes the need for folding. This method contributes to maximizing storage efficiency while accommodating different wardrobe configurations and preferences for organization.

By incorporating hanging storage for shorts, individuals can optimize their closet space, especially in environments with limited storage options. The adaptability of this method allows for the integration of various hanging organizers, such as multi-tiered hangers, clip hangers, and S-hooks, ensuring that different styles of shorts can be stored efficiently and remain easily accessible. Hanging shorts can help prevent creases, wrinkles, and distortions, maintaining the garments’ quality over time.

Roll The Shorts Instead

Rolling shorts presents a pragmatic approach to compactly store garments, minimizing the occurrence of wrinkles and optimizing space within drawers and travel luggage. This technique aligns with the goal of efficient clothing organization and care, catering to diverse storage preferences and lifestyle needs.

When rolling shorts, you can achieve a neatly organized drawer or carry-on bag while also preserving the fabric quality. By rolling each pair, you create a more condensed and uniform shape, reducing the likelihood of folds and creases. This method not only allows for better visibility and accessibility within the storage space, but also enables you to store more items. Whether it’s for everyday wardrobe management or travel packing, rolling shorts proves to be a practical solution for enhancing organization and space optimization.

What Are Some Common Mistakes When Folding Shorts?

Despite the importance of proper folding, several common mistakes can compromise the integrity and aesthetics of folded shorts. These mistakes include folding while shorts are still wet, not folding along the creases, folding too tightly, and neglecting to fold in the waistband. Marty Stevens-Heebner, an ADHD specialist, offers insights to avoid these pitfalls and ensure effective shorts folding.

When shorts are folded while damp or wet, it can lead to mold and mildew, causing permanent damage to the fabric. Not following the original creases can result in unsightly wrinkles and creases. Folding too tightly causes undue stress on the fabric fibers, leading to premature wear and tear.

Marty Stevens-Heebner recommends allowing shorts to air dry completely before folding, ensuring they are smooth and dry. She suggests folding along the original creases to maintain the garment’s shape and appearance, while also advising against over-tightening the folds which may distort the fabric.

Folding While Shorts Are Still Wet

Folding shorts while they are still wet can lead to fabric damage, mold growth, and persistent wrinkles, compromising the garment’s quality and longevity. Marty Stevens-Heebner, an ADHD specialist, emphasizes the importance of allowing shorts to thoroughly dry before initiating the folding process to mitigate potential issues associated with dampness.

Wet fabric is prone to stretching, weakening, and developing an unpleasant musty odor as a result of being folded before drying properly. This can ultimately affect the structural integrity of the shorts and reduce their lifespan.

The trapped moisture provides an ideal environment for the growth of mold, which not only causes discoloration and unpleasant odors but also poses potential health risks.

By following these simple yet crucial steps of ensuring complete drying before folding, individuals can preserve their shorts’ quality and prevent the formation of mold, promoting both clothing longevity and personal wellbeing.

Not Folding Along The Creases

An overlooked aspect of shorts folding is the failure to align with existing creases, leading to irregular folds and increased susceptibility to wrinkles. Properly folding along the creases is essential for achieving compactness and minimizing the likelihood of crease-related imperfections in the stored shorts.

By adhering to the existing creases in the fabric, you are essentially utilizing the garment’s natural structure to your advantage. This method not only ensures a tidy and uniform appearance but also helps in preserving the longevity of the material.

Optimally folded shorts are more straightforward to store and retrieve when needed, promoting efficient clothing organization. Maintaining the original creases can spare you the hassle of ironing or steaming out stubborn wrinkles, saving time and effort in the long run.

Folding Too Tightly

Excessive tightness in shorts folding can lead to fabric strain, distortion, and an increased likelihood of wrinkles, undermining the effectiveness of the folding process. Balancing compactness with fabric integrity is vital to achieve successful storage and minimize the risk of creases and distortion in the folded shorts.

When shorts are folded too tightly, the continuous pressure can cause the fibers of the fabric to stretch, resulting in visible distortion and an unsightly appearance. The increased tension within the folded fabric can lead to the development of wrinkles that are much harder to remove. The overstretching caused by excessive tightness not only affects the visual aesthetics but also compromises the structural integrity of the garment, reducing its lifespan. Therefore, it is essential to strike a balance between achieving a compact fold and ensuring that the fabric maintains its natural shape and elasticity.

Not Folding In The Waistband

“Neglecting to fold in the waistband during the shorts folding process can compromise the garment’s structure, leading to uneven folds and potential wrinkling. According to advice from Marty Stevens-Heebner, an ADHD specialist, including the waistband in the folding sequence is crucial to maintain the integrity and aesthetics of the stored shorts. To ensure proper care of your shorts, it’s essential to acknowledge the role of the waistband in preserving the garment’s shape. By incorporating this step, you can minimize the risk of wrinkles and prolong the lifespan of your shorts, ultimately contributing to their longevity and visual appeal.”

“Neglecting to fold in the waistband during the shorts folding process can compromise the garment’s structure, leading to uneven folds and potential wrinkling. According to advice from Marty Stevens-Heebner, an ADHD specialist, including the waistband in the folding sequence is crucial to maintain the integrity and aesthetics of the stored shorts.

To ensure proper care of your shorts, it’s essential to acknowledge the role of the waistband in preserving the garment’s shape. By incorporating this step, you can minimize the risk of wrinkles and prolong the lifespan of your shorts, ultimately contributing to their longevity and visual appeal.

How To Store Folded Shorts?

Storing folded shorts effectively requires considerations for various options, including in a drawer, on a shelf, or in a storage container. Leveraging expertise from a Senior Move Manager ensures strategic placement of folded shorts for efficient access and streamlined organization within residential spaces.

Placing folded shorts in a drawer is a popular choice for many due to its accessibility and ease of organization. It allows for quick visual identification and can be conveniently categorized by type, color, or occasion. It’s essential to ensure proper folding to maximize space and prevent excessive creasing.

On a shelf, folded shorts offer a visually appealing display and can be easily accessible if stacked neatly. They are also less prone to wrinkles compared to being stored in a drawer. Yet, dust can accumulate, compelling regular cleaning and maintenance of the shelf.

Opting to store folded shorts in a storage container is beneficial for preservation, especially when using containers with breathable fabric or compartments. This method is ideal for seasonal shorts, and it facilitates easy relocation when needed. Despite these advantages, it is crucial to label containers for quick retrieval and maintain regular air circulation to prevent odors or moisture buildup.

In A Drawer

Storing folded shorts in a drawer offers a convenient and space-efficient solution, ensuring easy access and visual tidiness within the storage furniture. Collaboration with a Senior Move Manager facilitates optimized drawer organization, aligning with individual preferences and spatial constraints.

Folding and storing shorts in a drawer not only saves space in your closet but also makes it easier to find the pair you want to wear. Drawer organization ensures that the shorts remain wrinkle-free and easily accessible.

The expertise of a Senior Move Manager can provide valuable insights into how to best utilize drawer space for efficient clothing storage. By integrating practical systems such as drawer dividers and storage bins, you can maintain a clutter-free environment and a well-organized residential space.

On A Shelf

Placing folded shorts on a shelf offers visibility, accessibility, and an opportunity for creative wardrobe displays within living spaces. Collaboration with a Senior Move Manager ensures strategic shelf utilization, catering to aesthetic preferences and organizational objectives in residential settings.

When stored on a shelf, folded shorts can be easily seen and accessed, allowing for effortless outfit selection and organization. The visibility also encourages incorporating them into stylish wardrobe arrangements, enabling individuals to showcase their fashion preferences and seasonal variations effectively.

By consulting with a Senior Move Manager, one can optimize the configuration of the shelf to accommodate the specific types of shorts and other clothing items. This collaborative approach aids in creating an organized and visually appealing setting, aligning with the principles of effective residential organization and space utilization.

In A Storage Container

Utilizing a storage container for folded shorts offers a practical solution for managing seasonal rotations and preserving garment integrity. Expert input from a Senior Move Manager ensures efficient container utilization, addressing specific storage requirements and maximizing space usage within residential environments.

By employing storage containers for folded shorts, individuals can seamlessly organize and access their seasonal clothing items. These containers not only help in preserving the quality of shorts but also contribute to a clutter-free living space.

The insights provided by Senior Move Managers emphasize the importance of using the right type and size of containers to accommodate different clothing items effectively. This guidance helps individuals to make the most of their storage space while maintaining an organized living environment.

Categories
Uncategorized

My top 10 favorite diaper organizers

Parenthood is filled with countless joys and challenges, one of which is keeping your nursery organized and efficient. Diaper organizers play a crucial role in this, offering a practical solution for storing diapers and essentials.

But with so many options, what should you look for in a diaper organizer?

Well, here are my favorites that I love to use in my celebrity clients homes:

Types of Diaper Organizers

Hanging Organizers: Ideal for saving space, these can be hung on doors or walls.

Portable Diaper Caddies: Perfect for on-the-go parents, offering mobility and convenience.

Dresser Top Organizers: Great for keeping essentials at arm’s reach.

My Top 10 Favorite Diaper Organizers

This is my personal favorites list of the best diaper organizers, each unique in its features and benefits.

1. The Ultimate Wall-Mounted Diaper Organizer

This organizer is a game-changer for space-saving. It features multiple pockets and shelves, offering ample storage in a compact design.

I love it because it has an attractive finish which my clients love because it helps maintain the aesthetic appeal of their space.

Link: https://amzn.to/3tfEjUi

2. The Compact Portable Diaper Caddy

Lightweight and versatile, this caddy is ideal for parents who are always on the move. It’s easy to carry and can store all your diaper-changing essentials.

I love this caddy because it’s cheap enough that it can get dirty (which is inevitably will), and can be easily replaced. It’s great for on-the-go.

Link: https://amzn.to/3RgzrX0

3. The Acrylic Dresser Top Organizer

I buy this one for my friends who are new moms! And they love it.

It’s stylish, modern and has a place for everything. This organizer fits beautifully atop any dresser. It’s designed to hold diapers, wipes, and creams super neatly.

I highly recommend!

Link: https://amzn.to/47T5hA5

4. Compact Multi-Pocket Organizer

This is a slightly more compact and straightforward version of #4 on the list. It’s at a cheaper price point which is great.

This is great if you’re in a small space like an NYC apartment. Typically in places that lack space, you’ll want to go for something a bit more compact.

Which makes this a great alternative.

Link: https://amzn.to/487SA4s

5. The Eco-Friendly Diaper Storage Solution

Made from sustainable materials, this option is perfect for environmentally conscious parents. It’s durable and has a minimal ecological footprint.

I bought this bag for my best friend Mia when she had her first baby. She loves it!

Link: https://amzn.to/3RH1wYT

6. The Modern Minimalist Diaper Holder

For those who love a clean, modern aesthetic, this organizer is ideal. It’s practical yet stylish, blending seamlessly with contemporary nursery decor.

It’s relatively no frills and perfect for on-the-go. It’s a great stylish upgrade to #2 on the list.

Link: https://amzn.to/4aibN5a

7. Plastic Caddy Cart

Offering flexibility, this system can be tailored to your specific needs. Earlier in my career, I would buy this for new moms. It’s at a relatively low price point so it’s affordable, but it compromises on aesthetics.

Link: https://amzn.to/3RphLbX

8. Hanging Diaper Caddy

This is one of my favorites!

I love how it makes use of vertical space and honestly, it’s perfect for any style of nursery. Since it’s so compact, it’s easy to hide on the side of the crib and it’s got so many pockets and spaces which makes it great for storage.

Huge fan of this one for tight spaces!

Link: https://amzn.to/3RG4ugc

9. Hanging Diaper Caddy 2

This one is a slight variation of #8.

I love this one because it can fit so many diapers. It’s pretty insane how many it can store (52+!).

It can be hung in a similar way to #8 which is great so you can hide this on the side of the crib if you would like. This organizer is also relatively portable which is a great feature. It’s perfect for road trips!

Link: https://amzn.to/3NpWei4

10. Bear Diaper Organizer

This one is so cute! Affordability meets quality in this organizer. It’s a great option for parents looking for a functional, yet cost-effective solution.

It’s pretty similar to some of the other travel organizers that were previously mentioned, but the bear face adds a whole new level of cuteness included. It’s at a similar price point as well!

Link: https://amzn.to/3uPT80b

Tips for Organizing Diapers

Effective diaper organization extends beyond just having a good organizer; it’s about utilizing your space efficiently and keeping it tidy. One key strategy is to make the most of vertical space.

This can involve using hanging organizers or shelves to free up floor space and keep essentials within easy reach.

Additionally, regular restocking and decluttering are crucial. This not only ensures that you always have what you need at hand but also prevents the accumulation of unnecessary items that can lead to disorganization.

Lastly, labeling compartments is a simple yet effective way to maintain order. Clear labels help in quickly identifying where items are stored, making it easier to find what you need and also to put things back in their rightful place.

These practices, when combined, create a streamlined and stress-free diaper-changing environment.

Conclusion

Choosing the right diaper organizer can significantly ease the daily challenges of parenting. Our top 10 picks offer a range of options to suit different needs and preferences. Embrace an organized, stress-free approach to parenting with the perfect diaper organizer.

And also, whether you’re looking to organize a pantry, pants or anything else – always remember to have fun!

Categories
Uncategorized

The Art of File Folding Pants (Ultimate Guide)

Have you ever opened your closet and felt overwhelmed by the chaos of stuffed drawers and messy piles? 

This article dives into the art of file folding pants and transforming your wardrobe into a space of practical order.

Step-by-Step Guide to File Folding Your Pants

File folding pants is a straightforward process that, once mastered, can be done quickly and efficiently. 

Here’s how to do it step by step:

Step 1:

Start by finding a clean, flat surface, such as a table or bed. Lay the pants face up.

Step 2:

Fold in half from right to left. Notice the little triangle at the booty part of the pants? That’s what I call the “booty triangle.” Fold it over to create a clean, straight line.

Step 3:

Fold up the legs to right below the waistline.

Step 4:

Bring up the bottom of the pants to the middle.

Step 5:

Fold up the bottom again and align with the top. Place into a drawer with the rounded edge facing up. If storing on a shelf, see the tip at the right.

If storing on a shelf, in step 4, fold in half from bottom to top and place on the shelf with the rounded edge facing out.

Benefits of File Folding Pants

Space Efficiency

The primary benefit of file folding pants is the incredible space efficiency it offers. I help people maximize their spaces every single day.

Traditional stacking methods often lead to bulky piles that consume a significant portion of your drawer or shelf space.

File folding, on the other hand, compacts each pair of pants into a neat, small little bundle. This technique drastically reduces the volume each item occupies, allowing you to fit more into your storage areas. It’s particularly beneficial for those with limited closet space or living in smaller apartments. Imagine being able to fit all your pants in one drawer with room to spare!

Easy Access

Another significant advantage of file folding is the ease of access it provides. When pants are stacked one on top of the other, it’s challenging to pick out the pair you need without disrupting the entire pile. This often leads to a frustrating and time-consuming process of searching and re-folding.

File folding eliminates this hassle. Each pair of pants is visible at a glance, and you can effortlessly slide out the one you want without disturbing the rest. This system not only saves time but also reduces the stress of finding what you’re looking for.

Aesthetic Appeal

Beyond functionality, file folding brings an aesthetic appeal to your wardrobe management. An organized closet is pleasing to the eyes and the mind. When you open your drawer or closet, you’re greeted with a cohesive space where each item has its place. This tidy appearance is not just about looking good; it contributes to a sense of calm and order in your personal space. A well-organized closet can set a positive tone for the day, offering a small yet satisfying moment of accomplishment each morning. Additionally, the uniformity in appearance created by file folding can be a source of pride, reflecting your commitment to organization and care for your belongings.

File folding pants not only maximizes your storage space and simplifies your daily routine but also adds an element of aesthetic pleasure to your everyday life. Whether you’re looking to declutter, save time, or simply enjoy the ease of an organized space, file folding is a technique worth trying.

Common Mistakes to Avoid in File Folding

Pay attention to these specific tips so that you can be sure that your file folding technique is effective for all types of pants, leading to an organized and visually appealing wardrobe.

  • Over-folding can lead to unnecessary creases and can make the pants too bulky to fit neatly in the storage space. Aim for fewer, more precise folds.
  • Misaligning Seams and Edges: Ensure that all seams and edges are perfectly aligned before you start folding. Misalignment can lead to uneven folds, making the pants harder to store and potentially causing wrinkles where you don’t need them.
  • Make sure everything is the same width: this will help you maximize your drawer space without little extra pockets of space.
    It also makes piles look uniform and clean.

Conclusion: Embracing the File Folding Method

Adopting the file folding method for your pants is more than just a way to organize your closet; it’s a step towards a more structured and efficient lifestyle. Give it a try and watch the transformation unfold.

And always remember, whether you’re looking to organizer your pants, pantry, or baby’s diapers, always have fun!

Categories
Uncategorized

How to Organize Deep Pantry: A Comprehensive Guide

Are you struggling with organizing a pantry with deep shelves?

Fear not, as i’ll provide you with the ultimate guide to organize your deep pantry, maintain order, and create an efficient pantry system. Follow these essential steps to transform your pantry into a well-organized and visually appealing space.

organize deep pantry

Step 1: Evaluate Your Pantry Needs and Space

Conduct a Pantry Audit

Start by taking a thorough inventory of your pantry items. Create a list of all the items, categorizing them by type (e.g., canned goods, spices, grains, etc.) and noting their expiration dates. This process will not only help you identify what you have, but also reveal any duplicate items, expired goods, or items you may have forgotten about.

Measure Your Pantry Space

Next, measure the dimensions of your pantry, including the height, width, and depth of each shelf. Be sure to account for any architectural features, such as molding or support beams, that may impact the usable space. Record these measurements as they will be crucial in selecting the right storage solutions and planning your pantry layout.

Assess Your Pantry Usage

Take a moment to reflect on your cooking and shopping habits. Which items do you use most frequently? Are there any items that you rarely use but still want to keep on hand? Understanding your pantry usage patterns will help you prioritize the placement of items and ensure that the most commonly used items are easily accessible.

Consider Your Pantry Goals

Lastly, think about what you hope to achieve by organizing your pantry with deep shelves. Do you want to create a visually appealing space, maximize storage capacity, or improve efficiency when cooking and shopping? Identifying your goals will guide your decisions when it comes to choosing storage solutions and arranging items in your pantry.

Step 2: Empty Your Pantry and Clean

A key component of deep pantry organization is starting with a clean and empty space. By removing all items and thoroughly cleaning your pantry, you set the stage for a successful organizing process. Here’s how to tackle deep pantries with this step while incorporating some organic products for a more eco-friendly approach:

Clear Out Your Pantry

Begin by removing all items from your deep pantry shelves. As you do this, take the opportunity to sort and group items by category, making note of any expired goods or duplicates. Set aside any non-perishable items that you no longer need or want, and consider donating them to a local food bank or charity.

Clean The Pantry

With your pantry empty, it’s time to clean every nook and cranny. Thoroughly clean the pantry floor by sweeping or vacuuming up any dust and crumbs.

This is my favorite cleaning product that can truly get rid of anything. It’s a miracle worker.

clean deep pantry

Step 3: Sort and Categorize Pantry Items

Effectively organizing deep pantry shelves requires a logical and efficient system for grouping items. By categorizing pantry items based on usage and similarity, you’ll create a functional and accessible storage system. Here’s how to sort and categorize your pantry items to optimize deep pantry storage:

Identify Common Categories

Start by identifying the most common categories of items found in your pantry. Some examples include:

  • Baking supplies: Flour, sugar, baking powder, baking soda, etc.
  • Canned goods: Soups, vegetables, fruits, beans, etc.
  • Breakfast items: Cereal, oatmeal, granola, etc.
  • Snacks: Chips, crackers, popcorn, nuts, etc.
  • Cooking essentials: Oils, vinegars, condiments, spices, etc.
  • Grains and pasta: Rice, quinoa, couscous, noodles, etc.

Create Custom Categories

In addition to the common categories, consider creating custom categories based on your own pantry needs and preferences. For example, you might create a category for:

  • International cuisine: Ingredients for making your favorite international dishes.
  • Health foods: Items like protein bars, superfoods, and supplements.
  • Beverages: Tea, coffee, hot chocolate, and other drink mixes.

Sort Items by Category

Once you have established your categories, sort your pantry items accordingly. This process may involve reorganizing items that were previously stored together, but it will ultimately lead to a more efficient and accessible pantry system.

Use Consistent Labeling

To maintain your deep pantry storage organization, create consistent labels for each category. This can be done using a label maker or by using a chalk marker on your storage containers or by labeling the designated areas on your shelves. Clear and consistent labeling and clear storage containers will help you quickly locate items and ensure that everything has its designated place in your pantry.

By organizing your pantry items into logical categories, you’ll optimize your deep pantry storage and make it easier to locate and access items when needed. With a well-organized pantry, you’ll save time and effort in your daily meal preparation and reduce the likelihood of purchasing duplicate items, ultimately contributing to a more efficient and enjoyable cooking experience in your own pantry.

labeled items in pantry

Step 4: Select the Right Storage Solutions

Invest in high-quality storage solutions to make the most of your deep pantry shelves. And don’t forget, buy it right or buy it twice. Organizing products are high traffic items that need to stand the test of time and usage. Some options to consider include:

  • Stackable clear containers: These allow you to see what’s inside and save space by stacking items vertically. These are my go-to’s that I use in every pantry project.
  • Shelf dividers: Use these to create designated sections for different types of items.
  • Lazy Susans: These rotating trays provide easy access to items at the back of deep shelves. Easily the most versatile product out there.
  • Slide-out drawers: Install these to utilize the full depth of your pantry shelves and easily access items stored at the back. No more black hole cabinets.
slide out drawers in deep pantry

Step 5: Arrange Items Strategically

A well-organized deep pantry involves strategic placement of items to ensure easy access, efficient use of space, and optimal storage conditions. Here are some in-depth details and practical tips for arranging items in your pantry:

Store Frequently Used Items at Eye Level

Make sure the items you use most often are positioned at eye level for easy access. I call this “prime real estate” in organizing. This will save you time and energy when preparing meals or searching for ingredients. Consider creating a designated “favorites” section at eye level to hold your most frequently used items.

Practical Tip: If you have a family with children, store kid-friendly snacks and items at a lower height, so they can easily access them without needing assistance.

Place Heavier Items on Lower Shelves and Lighter Items on Higher Shelves

Store heavier items, such as canned goods, jars, or bulk containers, on lower shelves to prevent accidents and reduce strain when lifting. Conversely, place lighter items, like cereal boxes and paper goods, on higher shelves.

Practical Tip: To reduce the risk of items toppling over or being pushed to the top shelf or back of the pantry, use shelf dividers or clear bins to keep heavy items secure and organized.

Keep Similar Items Together in Designated Zones

Group items by category or purpose and designate specific zones for each group. This not only helps you find items quickly but also simplifies meal planning and grocery shopping.

Practical Tip: Use shelf labels or hanging tags to clearly mark each drawer unit or zone, making it easy for everyone in the household to maintain the organization system.

Utilize Vertical Space by Stacking Items and Using Shelf Risers

Deep pantry shelves often have ample vertical space that goes unused. Maximize this space by stacking items, either by hanging shelves directly on top of each other or by using stackable storage containers.

Practical Tip: Use shelf risers or tiered organizers to create additional levels within your pantry shelves, allowing you to store more items vertically without sacrificing visibility or accessibility.

Rotate Items Based on Expiration Dates

When placing items in your pantry, be mindful of their expiration dates. Position items with the soonest expiration dates toward the front, and those with later dates toward the back. This practice, known as stock rotation, helps prevent food waste by ensuring that items are used before they expire. Use a chalk marker to easily write expiration dates if you are decanting into jars.

Practical Tip: Periodically check expiration dates during your regular pantry maintenance routine to ensure that items are being used in a timely manner and to avoid unnecessary waste.

tiered expiration pantry items

Step 6: Label Everything

Labeling is a crucial component of deep pantry organization, as it helps you quickly locate items, maintain order, and ensure that everyone in the household can adhere to the established system. This is a classic label maker that will stand the test of time. Here’s an in-depth look at the benefits of labeling, as well as some tips for creating an effective labeling system:

Benefits of Labeling

  • Ease of Access: Labels make it simple to find specific items, eliminating the need to rummage through the pantry and potentially create disarray.
  • Time Savings: By clearly indicating the location of each item, labels save time when preparing meals or searching for ingredients.
  • Improved Maintenance: A well-labeled pantry is easier to maintain, as it allows for quick identification of items that need restocking or replacement.
  • Consistent Organization: Labels ensure that everyone in the household can understand and follow the pantry organization system, contributing to a more orderly and efficient home.
pantry labeled items

Tips for Creating an Effective Labeling System

  • Choose a Labeling Method: Select a method for creating your labels, such as using adhesive labels, a label maker, or even a chalk marker on reusable containers. Your chosen method should be durable, easy to read, and aesthetically pleasing.
  • Use Consistent Fonts and Styles: Choose a font and style that is both legible and visually appealing. Maintain consistency throughout your pantry to create a cohesive look and make it easier to locate items.
  • Include Important Information: In addition to the name of the item, consider including other pertinent details on the label, such as expiration dates, cooking instructions, or allergen information.
  • Label Containers and Zones: Apply labels to both individual containers and designated zones on your pantry shelves. This will help maintain organization by ensuring that items are returned to their proper locations after use.
  • Update Labels as Needed: Keep your labeling system up to date by replacing worn or outdated labels and creating new labels as you introduce new items or categories to your pantry.
organized pantry labels

Step 7: Establish a Pantry Maintenance Routine

To keep your pantry organized, establish a regular maintenance routine. This may include:

  • Weekly inventory checks: Make sure items are in their designated zones and discard expired items.
  • Monthly deep cleaning: Remove all items, clean shelves, and reorganize as needed.
  • Seasonal updates: Adjust your pantry layout to accommodate seasonal items and changing needs.

By following these essential steps, you’ll create a well-organized, efficient, and visually appealing pantry with deep shelves that will serve you well for years to come. Remember, a well-organized pantry not only saves time and energy but also reduces waste and saves money in the long run. So, invest the time and effort now to create a pantry that works for you and your family.

organized deep pantry

Summary

How do you organize a super deep pantry?

To organize a super deep pantry, follow these steps:

  • Evaluate your pantry needs and space, taking inventory of your items and assessing your storage requirements.
  • Empty your pantry and clean it thoroughly.
  • Categorize and group pantry items based on usage and similarity.
  • Select appropriate storage solutions, such as clear bins, lazy susans, and shelf risers, to optimize space and accessibility.
  • Arrange items strategically, keeping frequently used items at eye level and storing heavier items on lower shelves.
  • Label everything, including containers and designated zones, for easy item location and maintenance.
  • Maintain organization through regular checks and updates, ensuring that items are used before their expiration dates and that the pantry remains clutter-free.

What do you store in a deep pantry?

In a deep pantry, you can store various food items there, such as:

  • Canned goods (vegetables, fruits, beans, soups, etc.)
  • Baking supplies (flour, sugar, baking powder, etc.)
  • Breakfast items (cereal, oatmeal, granola, etc.)
  • Snacks (chips, crackers, nuts, etc.)
  • Cooking essentials (oils, vinegars, condiments, spices, etc.)
  • Grains and pasta (rice, quinoa, couscous, noodles, etc.)
  • Beverages (tea, coffee, drink mixes, etc.)
  • Bulk items (large bags of rice, beans, etc.)
  • Paper goods (napkins, paper towels, etc.)

How do you organize a thin and deep pantry?

Organizing a thin and deep pantry involves maximizing vertical space and ensuring items are easily accessible. Here are some tips to organize deep pantry well:

  • Use tiered shelf organizers or shelf risers to make use of vertical space and increase visibility.
  • Install pull-out shelves or drawers to improve access to items stored deep within the pantry.
  • Utilize door-mounted storage racks for additional storage space.
  • Employ clear, stackable storage containers to maximize space and visibility.
  • Store items in narrow, tall containers that make better use of the available space.
  • Categorize and group items, arranging them strategically for easy access.
  • Label everything for simple item location and pantry maintenance.

I hope this article was helpful. If you would like more curated tips feel free to reach out on this page.

And also, whether you’re looking to organize a pantry, pants or even your baby’s diapers – always remember to have fun!